Cookie-Sheet Travel Activity: Magnetic Sandpaper and Yarn

Over the next week or so, I’ll be sharing some simple activities for road trips using a cookie sheet!  Believe it or not, a cookie sheet is a great asset to traveling with children…it can sit in a child’s lap and it creates an instant work/play space!

I have wanted to try the sandpaper and yarn busy bag idea for a while now, but thought it would also make an excellent travel activity if it was magnetic!

Here’s what you’ll need:  a cookie sheet, sandpaper (I used 9-inch), magnetic adhesive roll (which we got from CraftProjectIdeas.com), scissors, a ruler, and yarn.   Optional:  A Zipper pouch to hold the yarn.


1.  Cut the magnetic adhesive roll the same size as the sandpaper.


2.  Place the magnetic sandpaper onto the cookie sheet.


 3.  Measure and cut various colors of yarn.


 I used red, blue, yellow, green and white yarn.  I cut 3 pieces of each color in the following sizes:  12-inches, 6-inches, and 3-inches.


 Keep the yarn pieces in a zippered pouch or sealable plastic bag.


What is your favorite activity to take on road trips???

  • Share This Post:
  • Share This Post on Facebook
  • Share this Post on Twitter
  • Email this Post

Build-Your-Own Snowman (in a bag)

What kid doesn’t love building snowmen???  Now you can give the gift of snowman building and there is absolutely no snow required!

This is the perfect gift for preschoolers…it’s cheap, it’s interactive, and it’s fun!  Plus, it can double as a quiet time activity in church or doctors offices.

Here’s what you’ll need:
-felt in various colors (white, red, black/brown, gray, green, yellow, blue)
-1 sheet of blue stiffened felt (sold in sheets at craft stores)
-Scissors
-Hot glue gun
-Snowman template (printed, preferably on cardstock)
-Gallon-sized baggies
-Labels for bags

 
1.  Print out the template.  Cut out the pieces.  I didn’t end up using the template for everything (and I only cut out one of the buttons and eyes).  But I did definitely use it for the snowman’s body and the hat!

2.  Lay the templates on the felt.  Trace and cut.   As I went along, I added a few more pieces (like the limbs for arms instead of just the broom and the different shapes for buttons).

3.  Use the hot glue gun to glue any necessary pieces together.  I used the hot glue gun to make the stocking cap as well as to glue on some googly eyes to white felt for another eye option.

4.  Cut the blue piece of stiffened felt so that it will fit inside a gallon-size baggie.  Lay all the pieces on the blue felt and put inside the bag!

5.  Print the labels for the bags…I printed them on Avery Shipping labels that come 10 to a page (template #8163).


Here are a few of our silly snowman combinations:

Download the Snowman Template Here

Download the Labels for the Bags Here

Enjoy!

  • Share This Post:
  • Share This Post on Facebook
  • Share this Post on Twitter
  • Email this Post

What To Do When Naptime Ceases…

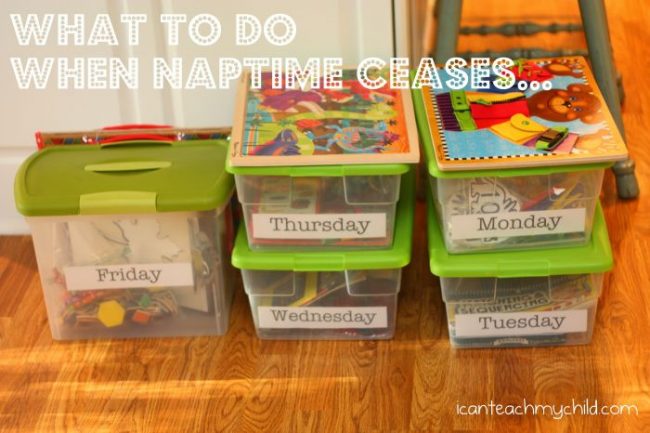
I don’t know about you, but my sanity break (and my blogging time) comes about 2:00 every afternoon…when my children nap. Both boys have thankfully been regular nappers their entire lives.

Until now, that is…

Big Brother will be four in January and he has dropped his nap.  He’s down to napping once every 4 or 5 days now.  I know I should be thankful that he’s kept it this long…and I am. But I’m also mourning the loss of some time to get things done. So I’ve implemented “room time” with Big Brother. He must stay in his room for an hour and a half each afternoon.

As much as I would love to admit that I’m doing this because it’s good for him to have some “down time” (which, of course, it is)…I’ll be honest and tell you that I’m mostly doing it for myself.  I need a little bit of time to get things done…to have a few moments of peace and quiet to get my wits about me before part 2 of the day begins.

Hence, the idea for quiet boxes…

I first saw the idea for these over on Money Saving Mom.  And I quickly raided the treasure trove of independent activities (most of them geared towards first graders) currently residing in my basement.  We also made an impromptu stop at Dollar General for some plastic tubs and the dominoes…the only two things that I had to purchase to create these tubs.

The boys have very few toys in their rooms.  I tend to think that rooms are for sleeping and if you have lots of “stuff” to play with, very little sleeping goes on!  So, I’m keeping these tubs in a closet close to Big Brother’s room and will take one out each day at naptime.

I decided to do five tubs, one for each weekday.  At the recommendation from a friend, Big Brother will get to choose his favorite on Saturday and Sunday.

I wanted to include something in each box that would fit each of the following categoies:

  • Something to help him LEARN
  • Something to LISTEN to
  • Something that he would LOVE

Want to know what’s inside each box???  I thought you’d never ask!


Monday:

-Crayola Color Wonder Drawing Paper and Markers
-Boggle Jr.
-Dino Clip Cards/Counters from Confessions of a Homeschooler 
-Do Your ABC’s, Little Brown Bear Book & Audio CD (purchased from my Scholastic Book Orders while I was teaching)

Tuesday:

-Dominoes
-Matching & Sequencing Flip Book
-Unifix Cubes
-Buzz said the Bee book and audio CD

Wednesday:

-Geoboard
-Heart Breaker Number Game
-My First Picture Dictionary Write-on Book
-Adventures in Odyssey:  At Home and Abroad Tapes (these are the actual tapes that I had when I was little)
-This is the House that Jack Built book and Audio CD

Thursday:

“Opposites” Matching Game
Dinosaur Lacing & Tracing
Tile Math (Marcy Cook Math…Big Brother LOVES this)
24-Piece Dinosaur Puzzle (puzzles are NOT Big Brother’s thing…so I’m sure this will be more frustrating than anything)
-I Like Myself book and Audio CD

Friday:

Melissa & Doug Magnetic Pattern Block Kit
 Clothespin Capital and Lowercase Matching Activity
A Clipboard, crayons, and some tracing cards
Adventures in Odyssey Tapes (not pictured)
Melissa and Doug Basic Skills Board (not pictured)

Although not pictured in the boxes, the Jesus Storybook Bible Deluxe Edition (with the audio CD’s) is also readily available in his room at all times.

The key to making this work is to include things that the child doesn’t already play with everyday.  As I said earlier, I did not go out and purchase a bunch of things…I used what I had.  Some of the “toys” that Big Brother had received in the past (like the magnetic pattern block kit, for example) had been put away because he wasn’t quite old enough to use them properly.  So this seemed new to him!

I tried to introduce each of the “new” activities to Big Brother in the morning prior to naptime so he felt comfortable with using them independently.  This is important, especially if it will be challenging to a child on his/her own.

I’ll probably change out some of the activities every month or so, just so that it stays fun and exciting.  I’ve also talked with a friend about trading boxes once a month to give our kids something completely new!

Another trick that seems to work wonders with keeping him in his room is telling him every time he comes out of his room, I’ll take something from his box away.  Seriously…why didn’t I think of this sooner???

Have you ever used quiet boxes?  If so, what activities do you include???

  • Share This Post:
  • Share This Post on Facebook
  • Share this Post on Twitter
  • Email this Post

"I Spy"

Here is a new take on the old game “I Spy”  It’s a great quiet time activity or you can make it for a very inexpensive gift for a child in your life!  Or take it on a car trip…like we will be doing tomorrow! 

If you use things you have around the house and buy a few little trinkets on clearance, this little game will probably end up costing you around $1 each! 

My friend Rachel first introduced me to this cute idea.  I believe she made hers at a Parents-as-Teachers playgroup. 

Here’s what you’ll need:  an empty and completely dry water bottle, sand (I used the extra fine sand), a funnel, glitter, various trinkets and craft supplies that will fit through the hole of the water bottle (I got the tiny blocks and sports erasers on clearance), and an index card.  Optional:  hot glue gun and a scrap piece of fabric.

1.  Using the funnel, let your little one help pour the sand about halfway up the bottle.

2.  Add some glitter.

3.  Put your trinkets in.  You can use beads, pom-poms, screws, nuts, bolts, craft supplies, numbers cut out from foam sheets, etc.  Let you and your child’s creativity be your guide…  :)

4.  After your items are placed inside, fill the water bottle up about 2/3 full.

5.  Put the cap on and tape around it.  If you have a child who is very persistent in your house like I do at mine…hot glue a piece of scrap fabric over the cap.

6.  Tie a ribbon onto the cap of the bottle.

7.  Make a “contents list” to tie onto the bottle.  This way your little one can try to find each of the items on the list. I only added the letter blocks for Big Brother’s name because they would have taken up the whole bottle had I added them all!

8.  Make a whole on the list and tie it to the ribbon on the bottle.

9.  Let your little one get started.  And if you’re anything like me, you’ll enjoy playing with it too!  :)

Literature Link:
I Spy board books by Jean Marzollo
These board books are excellent for children, starting around 2 years of age.  They are simplified versions of the “I Spy” books for older children.  One one side of the page are a few individual pictures of items (with word labels).  On the other side of the page is an entire scene in which you can find those individual pictures.  We have the Little Wheels book and Big Brother loves searching for the items in the picture!
I Spy Little Book
I Spy Little Wheels

I Spy Little Letters
abc button

  • Share This Post:
  • Share This Post on Facebook
  • Share this Post on Twitter
  • Email this Post