Lighted Nativity Ornament
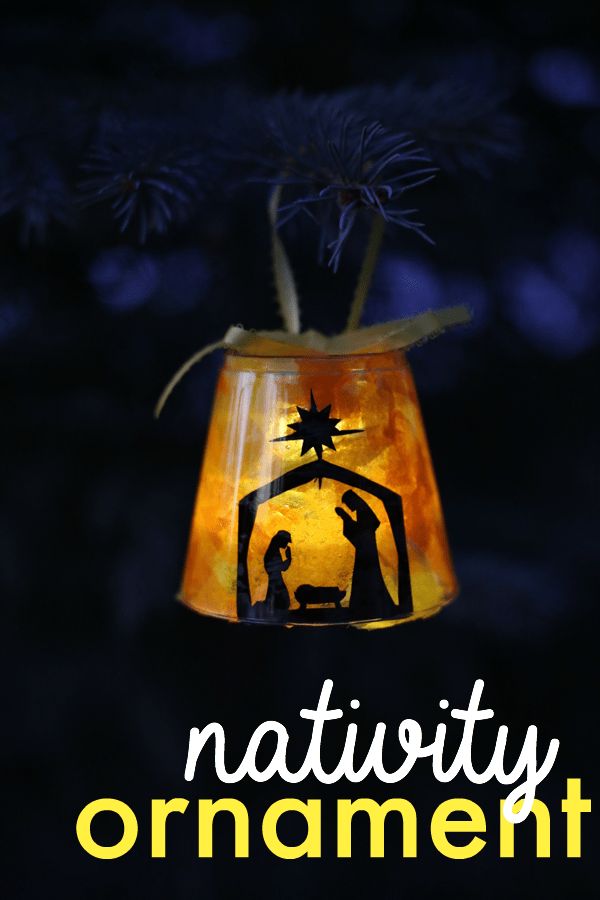

This Lighted Nativity Ornament is a version of our Shadowbox Nativity from last year that is perfect for hanging on the tree! It is such a meaningful reminder of the Reason for the Season! This would be a beautiful ornament for children to make and add to the tree, as we celebrate the birth of our Savior!
Cutting out the nativity silhouette is tedious, but you can easily work around this by printing it on translucent Vellum paper, which is what I wish I would have done to begin with!
Here’s what you’ll need:
Clear Plastic Cups
Matte Mod Podge (or mix 1:2 glue and water if you don’t have Mod Podge)
Paint or Foam Brush
Yellow and Orange Tissue Paper (or other colors too)
LED Tealights that twist on/off
Hot Glue Gun
Yellow Ribbon
Optional: Vellum Paper (instead of the cutting out the nativity)
As I said, if I had to do this all over again I would print the Nativity Silhouettes on the Vellum paper. It is translucent and it would save a TON of time as it is tedious to cut out the nativity image.
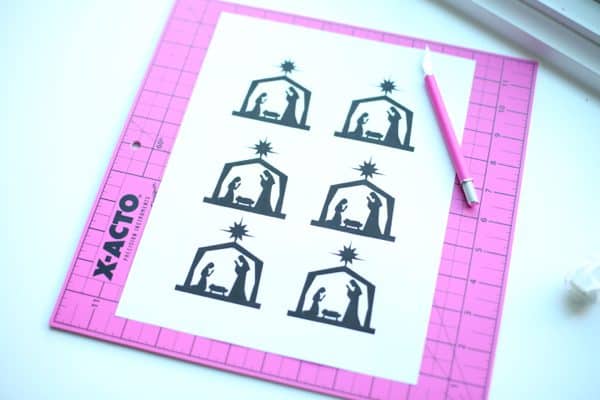
1. Print out the nativity silhouette printable.

2. Use an Xacto knife and mat to cut out around the outside edges of the nativity. (SKIP THIS STEP and the next one if you are using vellum paper and just cut loosely around the outside).

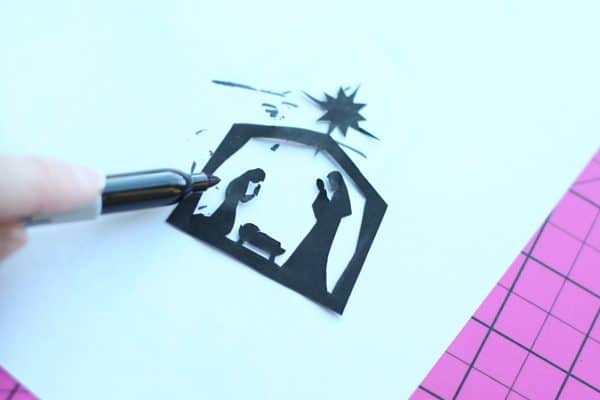
3. Use a black permanent marker to cover any remaining white on the edges of the nativity.


4. Add some Mod Podge (or glue/water mixture) to the clear plastic cup.

5. Lay the nativity image on top of the Mod Podge and cover with a bit more. Let dry for a few minutes so that it will stay in place once you put the tissue paper on.


6. Next, have your child practice tearing tissue paper into small pieces.

7. Use the paintbrush to spread more Mod Podge all over the inside of the plastic cup. Begin placing the tissue paper inside and pressing it down flat.


Don’t mind the crazy hair. :)

8. Leave it alone until the Mod Podge is completely dry.
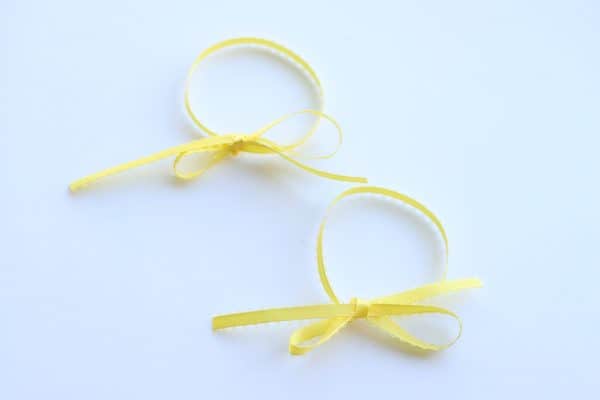
9. Make a loop and bow with a piece of yellow ribbon. This will be how you hang your ornament.

10. Take your LED tealight and add a generous helping of hot glue to the bottom. This is why finding an LED light with a twist on/off function is important…otherwise you won’t be able to turn it off or on once it is mounted to the cup. You could try to cut a hole in the plastic cup and put the switch on a regular taillight in the hole, but I was afraid that the plastic would crack.
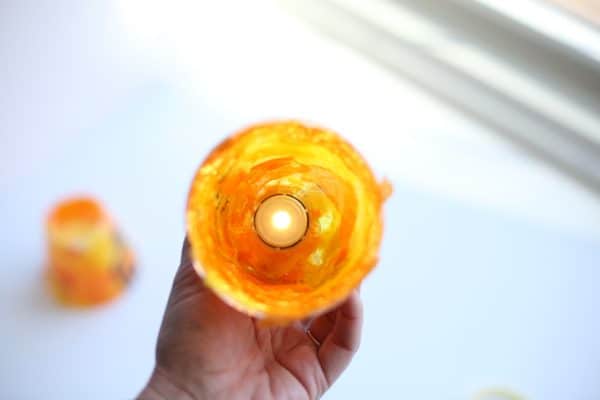
11. Quickly place the tealight into the bottom of the inside of the cup. Let it dry completely before twisting it off.

12. Use the hot glue to attach the ribbon to the top of the cup. And you are done!


Just wanted to let you know I linked to your fabulous Nativity craft in my post at MyCraftyZoo. You did an awesome job! Thanks for sharing!
This was awesome, and simple. My son has down syndrome and adhd. It’s an easy project and so captivating. Thank you!
So glad you and your son loved it!
How long does the tissue paper take to dry?
It depends on how much glue you use, but probably a couple hours.