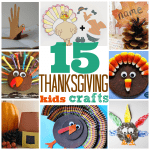
Golf Tee Turkeys

We had so much fun making these golf tee turkeys. They were inspired by our playtime with golf tees and playdough earlier in the week.
We painted our white golf tees in an unconventional way and then used our baking soda modeling clay for the body of our turkeys. I think they make the perfect decoration this Thanksgiving!

Here’s what you’ll need: Golf tees, Baking Soda Modeling Clay, paint, and googly eyes.
First, you’ll want to paint your golf tees (unless you are using pre-colored ones). We just put several into sandwich bags, added paint, and shook.


Then let them dry…

In the meantime, you can start making your modeling clay. Follow the instructions here.

Once the modeling clay is cooled, start forming your turkey! Once you have the body formed, you can start putting in the golf tees for the turkey’s feathers.


Let it dry overnight. Once dry, start painting! We just used tempera paints.


Add googly eyes once the paint is dry and the turkeys are ready to be displayed!


After they’re painted you can seal them with shellac, acrylic spray or even clear nail polish if you choose (we haven’t done this yet).
Looking forward to a happy Turkey Day!


This…is awesome. I was trying to come up with a craft for my daycare kids that is both process AND product oriented, and this is it! Definitely doing this later this month!
Cute Turkeys! I love them! We have made a bunch of 2-dimensional thanksgiving crafts/decorations, so this idea would be a much needed change. Thanks!
SUPER cute!! LOVE the idea!! I wanted to invite you over to my TGIF Linky party http://livinglifeintentionally.blogspot.com/search/label/Linkey%20Parties
Beth
Adorable!! I would love it if you would share them at my Sharing Saturday link party at http://craftymomsshare.blogspot.com/2011/11/sharing-saturday-4.html. Thank you!
Pinned this! Thanks for sharing!
These are adorable! We’ll be adding this to our homeschool schedule this week. Thanks for the great idea…