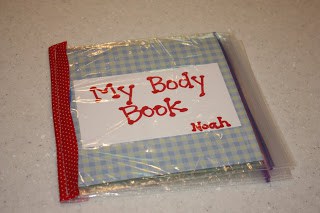
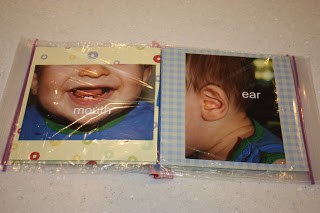
Plastic Baggie “My Body” Book
These little books are so cool! My good friend Sarah introduced me to these plastic baggie books and I decided to use pictures to help teach my boys their body parts. I made one last year for Big Brother and it was definitely a favorite, so now I’m making one for Little Brother! Babies and toddlers love seeing their own picture (or reflection, for that matter), so these books are perfect for them! Once they outgrow them, slip the pages out and put something new in (like shapes, for example).
It doesn’t take much longer to make a couple of the plastic baggie books than just one, so make a few to keep on hand for different activities besides the body book.
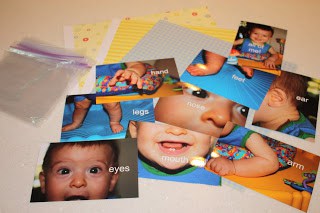
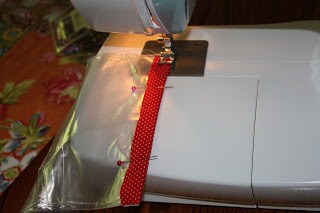
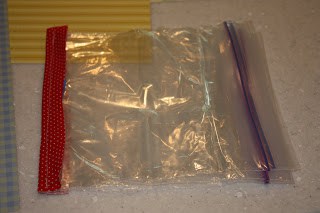
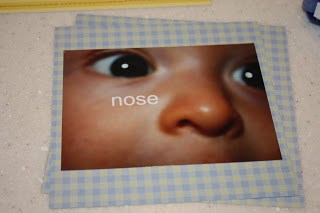
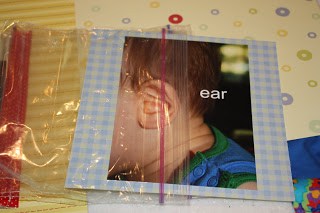
Here’s what you’ll need: plastic sandwich size zip-top baggies (I used 5 bags per book), Tape (not pictured), Pictures of your baby’s eyes, nose, mouth, ears, arm, hand, legs, feet, and a full body shot (preferably labeled), double-sided paper (I used scrapbook paper), a scrap of fabric, and a sewing machine or a needle and thread (not pictured). You can also make these without sewing them, I would just use something really strong–like duct tape–to hold them together.
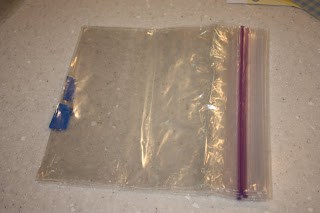
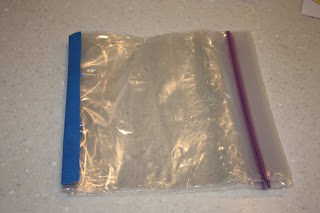
1. Place two zip-top plastic baggies on top of each other and use a tiny bit of tape to tape them together. Add each bag individually, taping each as you go.


Those are really cute! Thanks for sharing. Ori would love a book like that. Now we'll see if I am ambitious enough to make one. :)
Like I said, Julie, you can use duct tape too! You might start off using duct tape and if you like the books, then you can make more. :)
we have a new baby coming in october this will be good one to make the mommy
Great idea! We've made a similar craft for a "church bag." We sewed several quart size zip-locs together and then made a fabric cover and ties to keep it closed. We then filled each baggie with something quiet to do in church- crayons, paper, stickers, toy figures, etc. My kids loved them when they were small!
Wow, that is a great idea!
Great idea! Such a cute little book! Saw it featured on Money Saving Mom! I'm your newest follwer! I have a 5 yr old and a 2 yr old and we're homeschooling this year, I love your ideas on here! Very nice blog!
I LOVE this!! I think I'll make one for my baby whose still very little. I'll start out with pictures of family members "Mommy," "Daddy," "Grandma," etc.. then move up to things like body parts. Thank you so much for the idea!
This is just adorable! And looks easy to make. Thanks for showing me how ; )
Those are so cute!
Thanks for sharing, I will defiantly be making one….or five lol
That is such a great idea…looks like i know what i'm doing tomorrow after buying the ziploc bags
What a great idea! And so easy too! Thanks for sharing!
-Kara
http://littlelearnerslounge.blogspot.com/
These are such a great idea! And you can personalize it so easily. Thanks for sharing!
I use one of these with family in it. we don't get to see the extended family so we sit and look at each one through the day for recognition.
I LOVE these!! Thanks for the idea. I will make Lucy one this week!! :)
What a fun project! I'm sure my kids, especially my baby, would love to look at this all the time. Thanks for sharing.
You can also get a $1 4×6 album at the dollar stores.
I love this idea. I'll be featuring it in our DIY Literacy Projects at http://www.onthelap.org. Thanks for sharing this brilliant idea.
Love the pictures that were used! Perfect for little ones! =)
i'm loving this idea but scared my kids will tear it apart..is there anything to make the bags sturdier?
MarjnHomer…
I would recommend just making several of them at once. After a few months, they WILL get torn apart. That's why it's nice to have some backups. :)
I am in love with this idea! I'm going to make the "body" book, a "counting" book, a "family" book a "foods" book, an "animals" book….= D
LOVE this so much! Thanks for sharing!
~Dana
This is a GREAT idea!
I'll note this idea!
That's really neat! I have been meaning to make books for the kids OF the kids… but haven't gotten around to it yet. Story of my life (*points to self* Queen of Procrastination)
Thanks for this neat idea!
What size bags and photos do you normally use?
Ok, I'm SO using this idea at my classroom at school! My kids would love it :)
Taking a long trip soon will be bringing these along.
http://www.everydayonpurpose.blogspot.com
love, love, love this idea! So cute!!
http://www.chestnutgroveacademy.blogspot.com
Such a GREAT idea! I can't wait to make one of these for my baby!
Just made this today! Thanks for the idea! blessings Jacquie
This is totally cute! I am making one for my son and one for my therapy room (and sharing it with my coworkers)!
OMG! This is such a GREAT IDEA! We teachers run out of ideas sometimes but those who don’t find anything it’s because they’re not looking! I LOVE your website, I want to do EVERYTHING with my little ones.
Thank you so much for sharing!
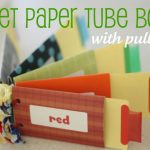
Thanks for the idea! We’re starting to use one for colors. We are putting things in the bag that match a certain color. Then, when we master that color, we add a new one to the next bag. I definitely need to do more of these.
This is a great idea to use I’ve been looking for great book ideas
I’ve heard of this idea before but thanks for the nice tutorial. Looks pretty easy but still nice.
These look awesome and I can’t wait to make one, yet I’m not much of a sewer. Does the fabric scrap used on the binding fray? Do I need to do something to prevent fraying, or will it not be enough to matter? I know my son will be chewing on it and I don’t want him to eat the fabric stings.
I’ve just found your site and think you’re doing a great job of providing ideas for educational experiences for families. I’m doing something similar from Canada, but geared for slightly older children. I’ve just subscribed to your email list so I’m eager to receive updates so I can do activities with my baby and 9 year-old.
Love this book idea. I don’t sew but I think I’m going to try it with duck tape.
Cheers!
Daniela @ passingnotes.org
Thanks so much for sharing this amazing tutorial!! I made a family book for my son to look at so he can become familiar to family members that he’ll be meeting for the first time and so that while we’re visiting he can see those that he’ll be missing! So simple and easy and my DS loves it!!
http://scraphappymandalue.blogspot.com/2012/05/ziplock-book-for-baby.html
I was thinking of making this for my daughter. When I saw the pic with your son’s name on it I had to laugh because my daughter’s name is Noa.
I’m the Editorial Assistant for Fun Family Crafts and I wanted to let you know that we have featured your project! You can see it here:
http://funfamilycrafts.com/ziploc-bag-book/
If you have other kid friendly crafts, we’d love it if you would submit them. If you would like to display a featured button on your site, you can grab one from the right side bar of your post above. Thanks for a wonderful project idea!
Hola…this is interesting. cool for kids, and it doesn’t get dirty ;-), feel free to check out some upcycling ideas over at my page
What a clever idea! And I love the versatility of what can go in the books, AND that the books can grow/change with the child. Thanks for sharing! :)