Today is Day 12 of our 31 Days of Outdoor Activities for Toddlers. Today we got DIRTY with this Dirt and Worms Sensory Tub. I originally saw this idea for using spaghetti worms over on Learning 4…
We have been all about butterflies at our house the last few weeks. We ordered some new caterpillars to watch and eventually moved them into our Insect Lore Butterfly Garden once they became chrysalises. Little Sister has LOVED…
Lots of people have enjoyed the Tie-Dye Baby Wipe Art post I shared a few weeks ago. My friend Deborah from Teach Preschool shared the idea on her Facebook page and one of her readers mentioned that she used baby…
We’re beginning a brand-new CAMPING thematic unit! The one thing that I like the least about camping is all the bugs…but they seem to be absolutely intriguing to kids. Want to encourage your child to dig for bugs in the…
We stumbled upon this adorable fable at our local library. Big Brother has wanted to read it over and over and over again! The story starts out with the little squeegy bug, who was having trouble finding his place in…
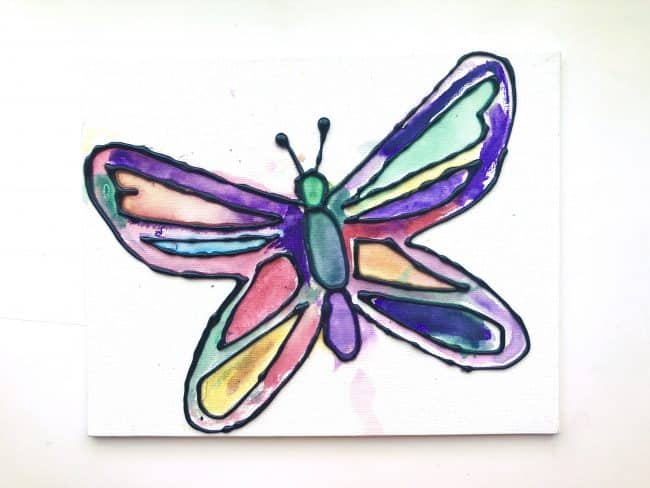
This craft sorta happened on accident. It is a combination of a leftover tie-dyed coffee filter from this post and the Bob & Larry Stained Glass. But boy, am I glad we stumbled upon it! I would like a few…
I’m typically not one to make food fun. To be brutally honest, by lunchtime I am exhausted (especially since LB isn’t taking a morning nap anymore) and typically can’t muster enough creative juices to do anything but slap some food…
Big Brother’s favorite part of making these butterflies was, hands down, using the spray bottle! And I just love how the colors blended together. The rest of it was pretty fun too, especially seeing the end result! And the best…
Those foam pool noodles are quickly becoming my favorite “manipulative”. For just $1, we’ve gotten three different uses out of one noodle (the rest of which I’ll share later this week). For this activity, we created a number game that…
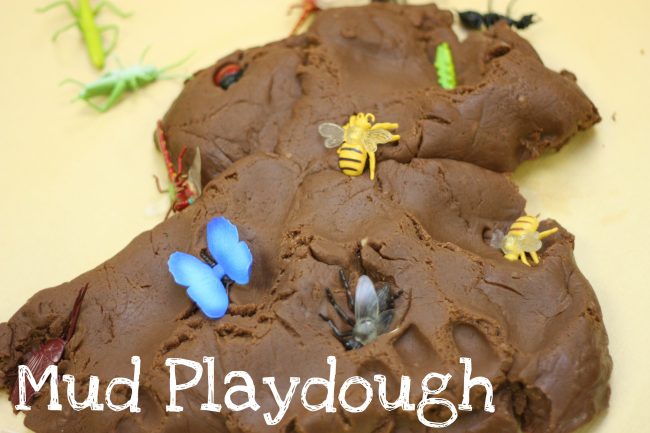
Who says you can’t play with your food??? We had so much fun making, playing with, and eating this playdough! This was an activity I did with my first graders when we were exploring the life cycle of a butterfly…
First of all, this wasn’t my idea. The amazing Deborah from Teach Preschool came up with this awesome activity. And we just had to do it since we have some caterpillars of our very own! Here’s what you’ll need: 2 sheets…
We learned this fun song in Sunday school! Big Brother refused to do most of the actions, but you wiggle your fingers, then hold them out long and short. Next, cup your hands like it’s a box. Shake your finger…