DIY Rocket Launcher
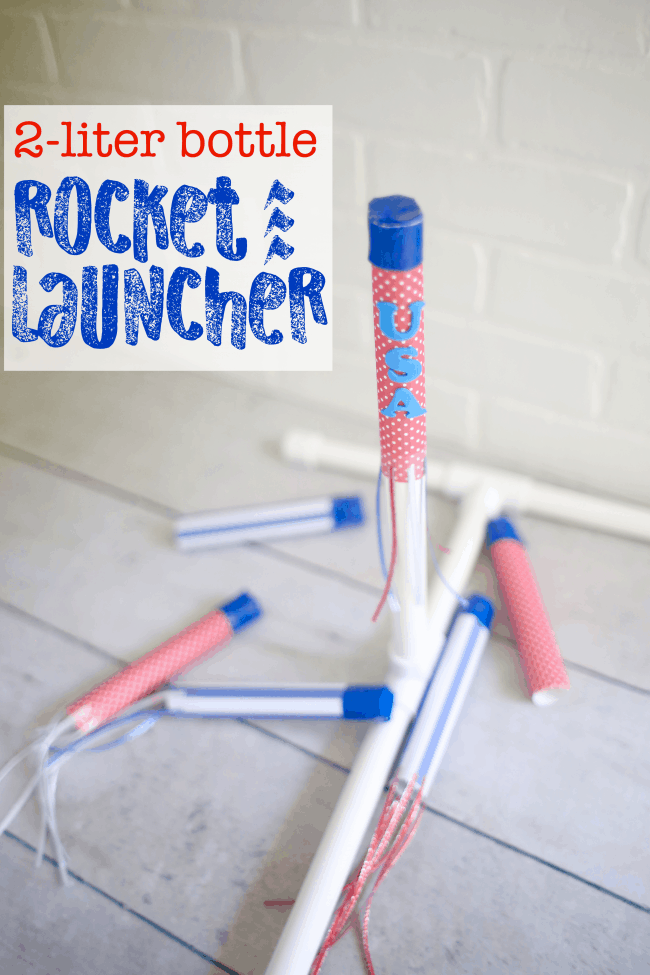
It’s Day 4 of our “A Very Toddler Fourth” series we are co-hosting with Kristina from Toddler Approved. Our DIY Rocket Launcher might be my favorite activity of the year! These rockets shoot much higher than I expected and are the perfect (and safe) alternative to fireworks for toddlers!
Our DIY Rocket Launcher was originally inspired by one of our elders at our church (who also happens to be a high school Science Teacher). He made several similar rocket launchers for VBS a few weeks ago and the kids went crazy for them!!
His original design included having to drill a hole in a 2×4 and add a screw into PVC, so I wanted to find something a little simpler. Thankfully, NASA had these amazing plans that we were able to adapt! Although this activity requires a bit of adult prep work in the beginning, once it is created it can be played with over and over again by your child! Older children can even help making the rockets!
Supplies for DIY Rocket Launcher:
5 foot 1/2-inch PVC pipe (that will be cut into pieces
(2) 1/2-inch Tee Connectors
(2) 1/2-inch Caps
(1) 1/2-inch Connector
Empty (and clean) 2-liter pop bottle
Duct Tape
12″ Scrapbook Paper (cut into 6″x6″ squares)
Double-sided tape
Ribbon (optional)
Permanent Marker
Step-by-Step Directions:

1. ADULT-STEP ONLY: Mark the 5-foot PVC Pipe. You’ll need three 12-inch pieces and then three 6-inch pieces. Cut using the PVC Cutting Tool or a hack saw (or beg the person at the home improvement store to cut it for you). I just purchased the PVC Cutting Tool because I got tired of having to ask my husband to hand-saw any projects where PVC is used (obviously, this is a very dangerous tool and only an adult should handle it- be sure to put it away as soon as you are done cutting).

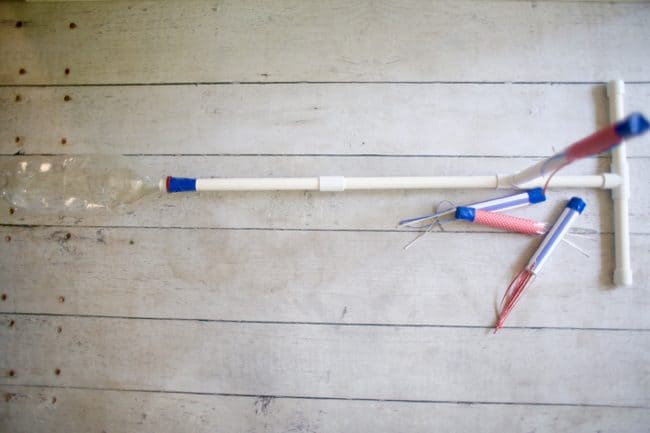
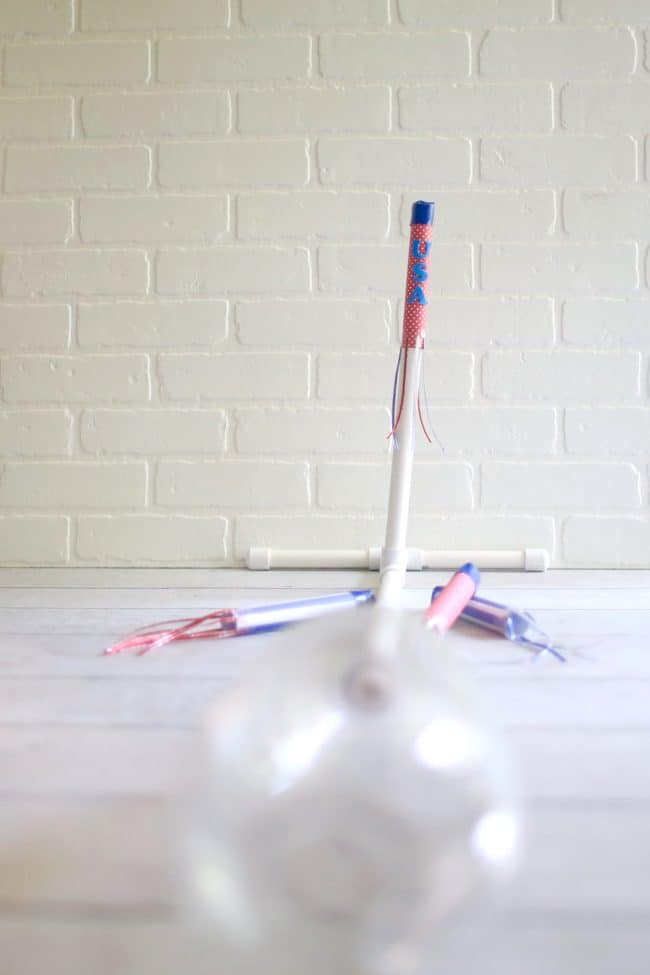
2. Gather the rest of your pieces to assemble the rocket.

3. Connect the pieces together shown above to make the rocket launcher. There is no need to glue the PVC pieces as they should stick together well just with a little elbow grease. Attach the 2-liter pop bottle to the end with duct tape.

To make the paper rockets, you’ll need some 12″ scrapbook (or construction) paper, duct tape, and double-sided tape. If you want to add a little pizzaz, you’ll also need some ribbon and transparent tape.

3. Cut the scrapbook paper into 4 equal pieces (6″ x 6″ squares).

4. Add a line of double-sided tape to one end and roll into a cylinder with a diameter of at least 1/2-inch.
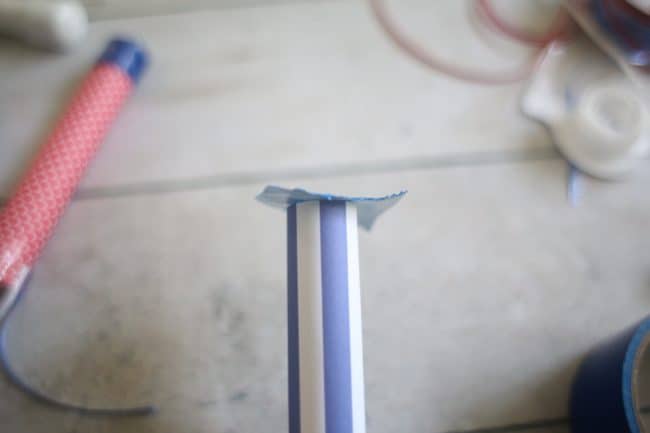
5. Tear off a small piece of duct tape and put it on one end of the paper cylinder.
 6. Press down the flaps.

7. Tear a longer piece of duct tape in half width-wise and then secure around the top of the paper cylinder.
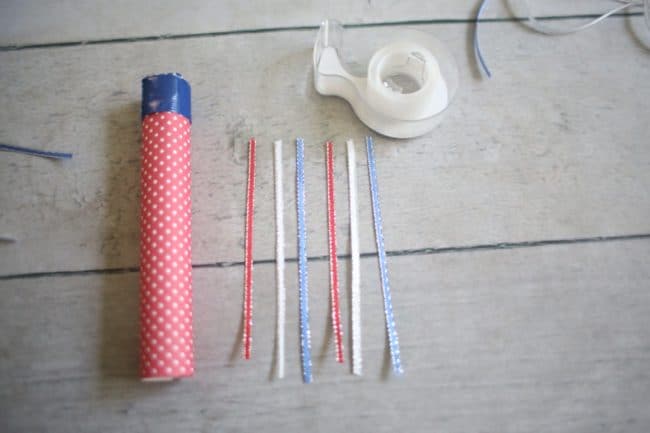
8. If you want to add some ribbon to the end, cut pieces of the same length and then use a single piece of transparent tape to secure them all onto the bottom of the rocket.

9. When your rockets are ready, just put one on the top of the rocket launcher…

…and let your child stomp on the 2-liter bottle!

To reinflate the pop bottle, just cup your hands around the top of the rocket launcher (where the rockets sit) and blow. You can also just put your mouth on it and blow if you don’t care about germs. :) I’m pretty sure this is what my kids do when I’m not looking!

Check out more fun toddler ideas for the 4th here:


Seeing them so attractive. Thanks to your writing, I have done pretty pen for you. Not only that, I can trade them.
It’s smart idea!
very good. Thank you for sharing!…………..
It’s smart idea!