Menu

  • Skip to primary navigation
  • Skip to main content
  • Skip to primary sidebar
  • Skip to footer
  • About
    • Developmental Domains of Early Childhood
      • Language Development
      • Cognitive Development
      • Motor Development
      • Social/Emotional Development
      • Self-Help/Adaptive Development
      • Spiritual and Moral Development
    • Contact
    • Privacy Policy
    • Disclosure/Disclaimer
    • Terms of Use
  • Thematic Units
  • Concepts
    • Alphabet
    • Number Recognition
    • Color Activities For Toddlers
    • Shapes
    • Reading
    • Science Experiments
    • Sunday School Activities
  • Holidays
    • Christmas
    • Easter
    • Fourth of July
    • Halloween
    • Thanksgiving
    • Valentine’s Day
  • For Parents
    • Gifts
    • DIY Ideas
    • Recipes
    • Photography Tips
    • A Lesson Learned
    • Tools
      • Infant Percentile Calculator
      • Children’s Percentile Calculator
      • Children’s BMI Calculator
  • Shop

I Can Teach My Child!

Activities and resources for parents of young children

  • Email
  • Facebook
  • Google+
  • Pinterest
  • RSS
  • Twitter
  • Blog
  • Birth-12 Months
  • Fun Activities For 1 to 2 Years Old
  • Home
  • 2-3 Years
  • 3-5 Years
  • 6+ Years

January 27, 2014 by Jenae - 9 Comments
This post contains affiliate links. Please see my disclosure policy.

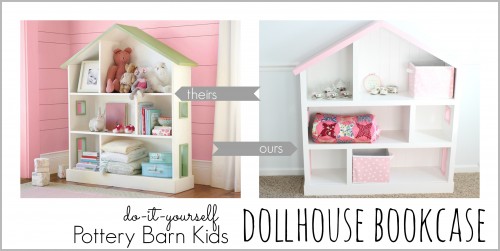
Cutest Dollhouse Bookcase To Build Yourself

DIY Dollhouse Bookcase


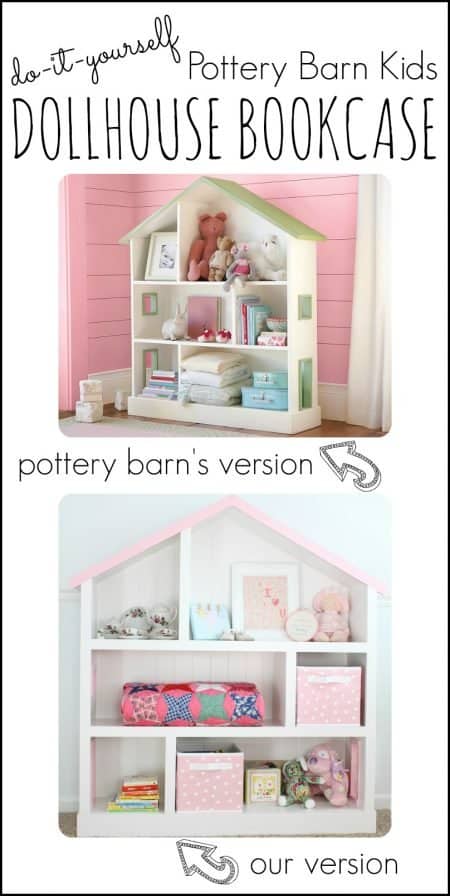
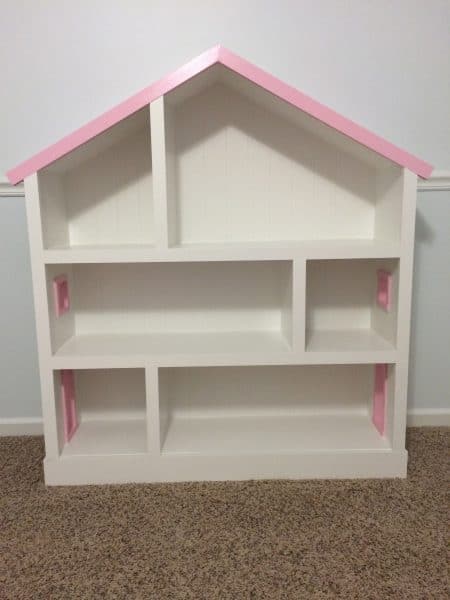
Last week I shared our baby girl’s nursery and promised plans and tutorial for building a dollhouse bookcase. When I was on bed rest and browsing Pinterest to plan a nursery, I found this adorable dollhouse bookcase (inspired by a Pottery Barn version) that I quickly fell in love with. Once we found out we were having a little girl, I begged Prince Charming to create a DIY version of the Dollhouse Bookcase. I found plans on Ana White, which we modified slightly. In total, we spent around $150 on wood and other materials. This is less than half of the Pottery Barn price! We chose to buy real wood for the entire bookcase, but you could easily save much more by using MDF.

Want to build your own dollhouse bookcase? This version is even better than the Pottery Barn version because it is made with REAL wood and all the edges are capped, giving it a more finished look. We used a beadboard wainscoting for the back, which I prefer.

Okay, let’s get started…

How To Build A Dollhouse Bookcase

Dollhouse Bookcase Plans:

First of all, download the plans for the Dollhouse Bookcase from Ana-White.com.

Supplies For Wooden Doll House:

Next, you’ll need to gather your supplies. In addition to all of the supplies on the shopping list for the plans, you’ll also need:

  • Oil-based primer (since you’re painting on bare wood)
  • Elmer’s Carpenter Wood Filler
  • moulding and trim caulking
  • 1 x 2 moulding
  • Beadboard wainscoting (instead of the plywood backing)

Dollhouse Bookcase Instructions:

diy dollhouse

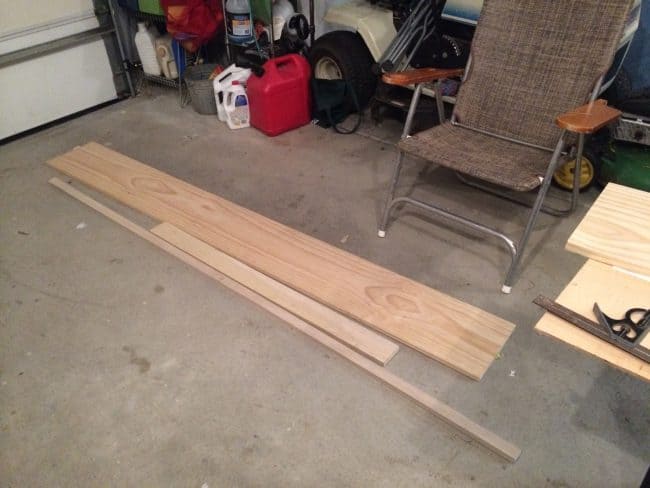
STEP 1. Set out all of your lumber.

IMG_3738

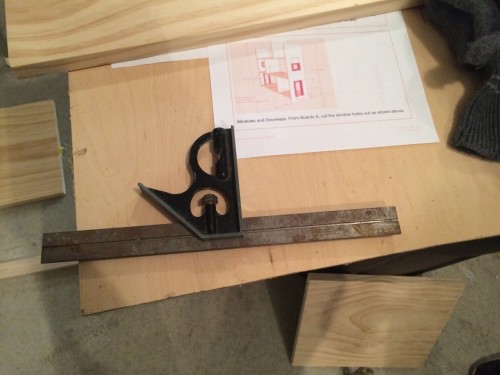
 STEP 2. You may want to use a framing square to mark your board prior to cutting.


diy dollhouse bookcase

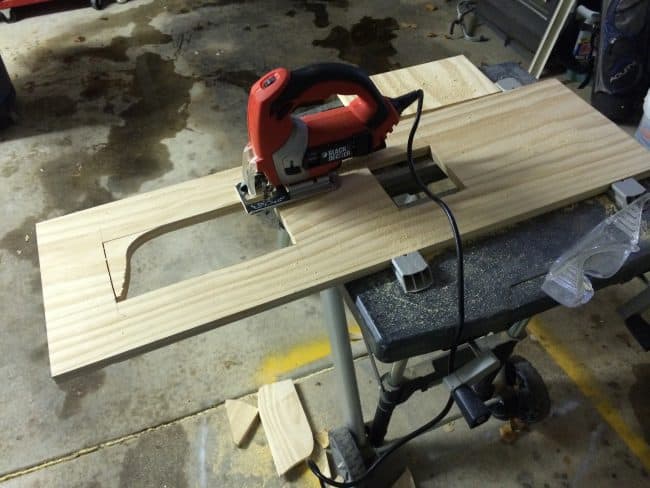
 STEP 3. After cutting your lumber, use the plans to outline where to cut the windows. You will use a jigsaw for this.


dollhouse bookcase

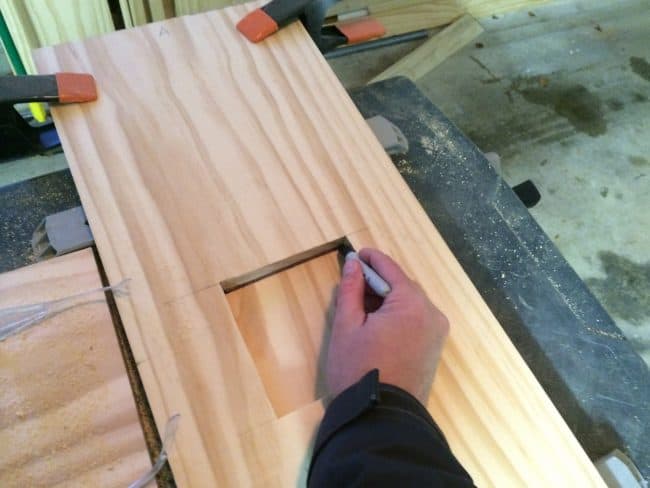
STEP 4. Match the boards together so that the windows are cut out evenly.


dollhouse bookcase

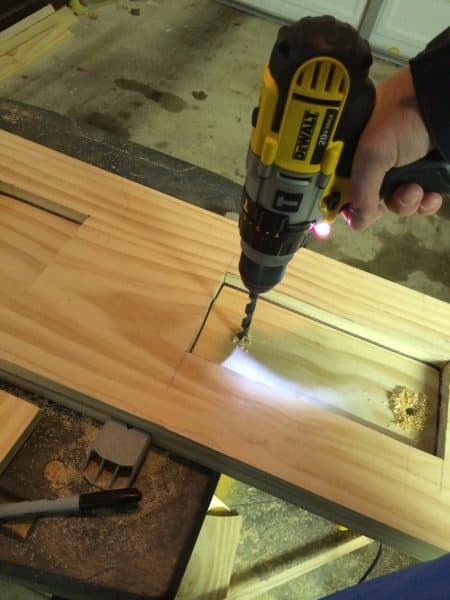
STEP 5. While using the jigsaw, you may want to drill pilot holes for the saw blade to enter.


wooden dollhouse

This view shows you how the front baseboard should overlap the side baseboards.


diy dollhouse bookcase

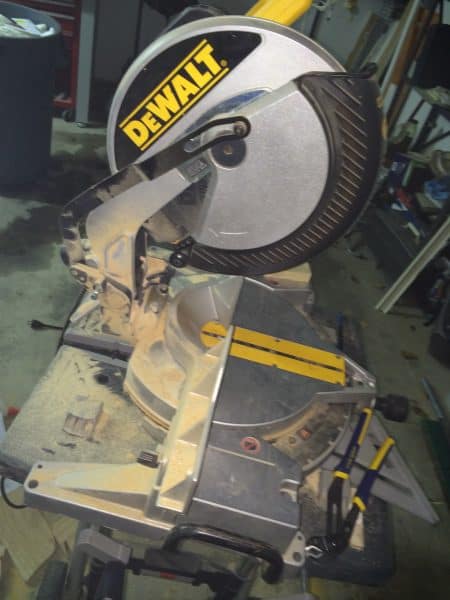
Note:  You will use a miter saw, much like this DeWalt version, for the majority of your cuts on this project.


wooden dollhouse

STEP 6. Use a circular saw to cut out the wainscoting backboard. This will allow for a nice straight cut.

diy dollhouse bookcase

STEP 7. After the wainscoting backboard has been cut, apply glue to the backside of each shelf. Then use your nail gun to tack it together.


building a wooden dollhouse

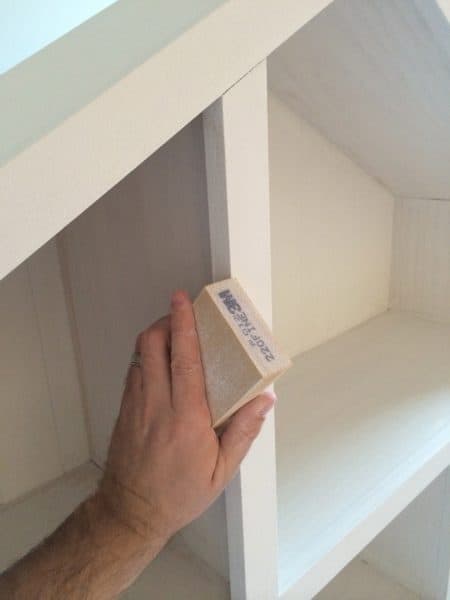
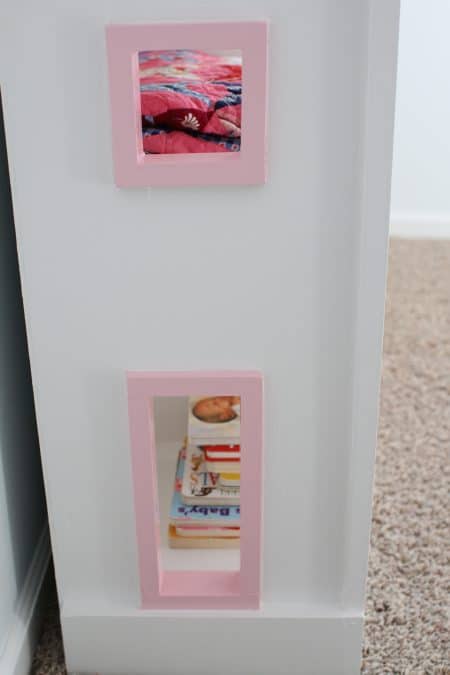
STEP 8. Building the windows can be a bit more tricky. You will want to make sure that these windows fit just right.


dollhouse windows

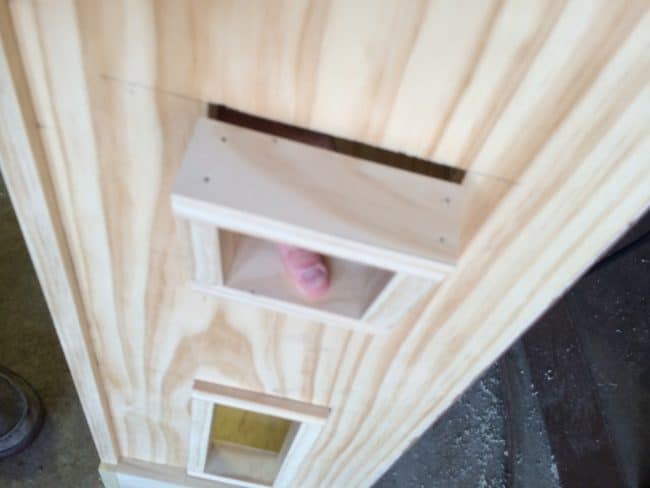
  As you can see, two nails per side were used to fasten the windows. Once they were nailed together, install them using a nail gun


capping on shelves

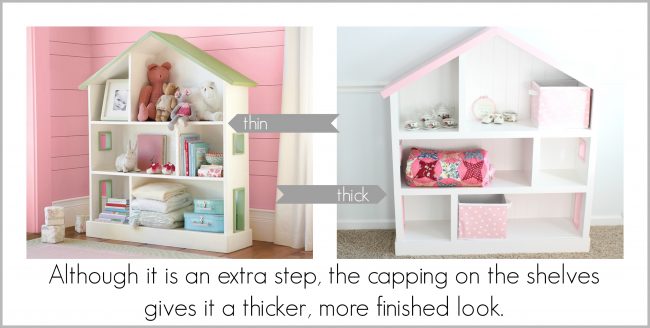
**STEP 9. This is where our version deviates from Ana White’s plans. To make it appear more finished, we capped all the edges with 1 x 2 moulding. You’ll need to measure each edge to get it exact and then use your nail gun to attach the capping onto each edge.


IMG_3800

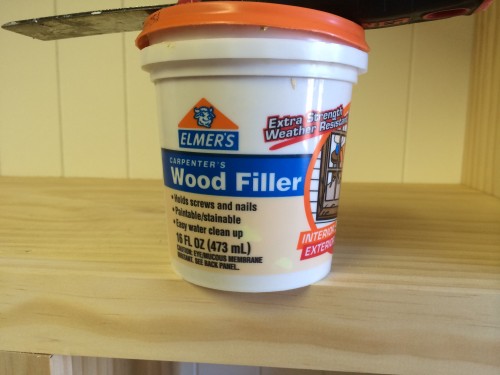
STEP 10. Once you’re done using your nail gun, you will want to go back and set the nails that did not sink below the surface of the wood. Once you’ve countersunk, then you are ready to fill the holes with wood filler. I used regular Elmer’s Carpenter Wood Filler.


paint the dollhouse

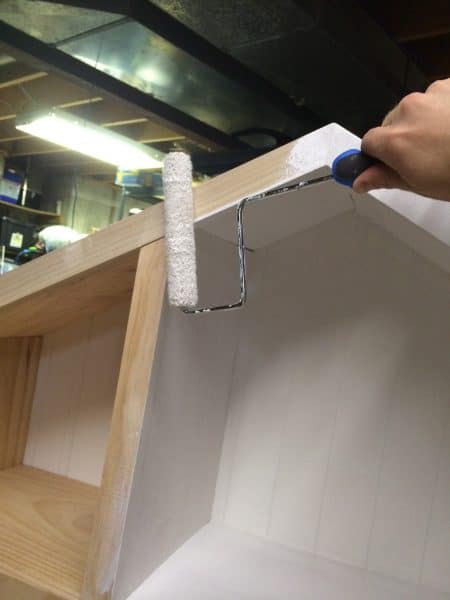
STEP 11. Once you have sanded all of the areas that you filled with wood filler, you are ready to prime. Using a roller, prime all the surfaces with an oil-based primer, since you are priming bare wood. You will definitely want to do this in an area that is well-ventilated, as oil-based primer puts off a strong odor.

diy dollhouse bookcase

STEP 12. Lightly sand all areas after the primer is dry.


diy dollhouse bookcase

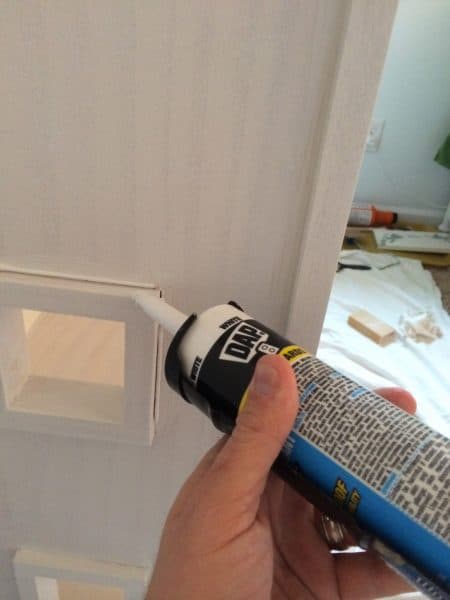
STEP 13. Use molding and trim caulking on all edges to provide a clean look.


diy dollhouse bookcase

STEP 14. Apply the first coat of paint. Let it dry, sand and apply a second coat of paint.


dollhouse bookcase

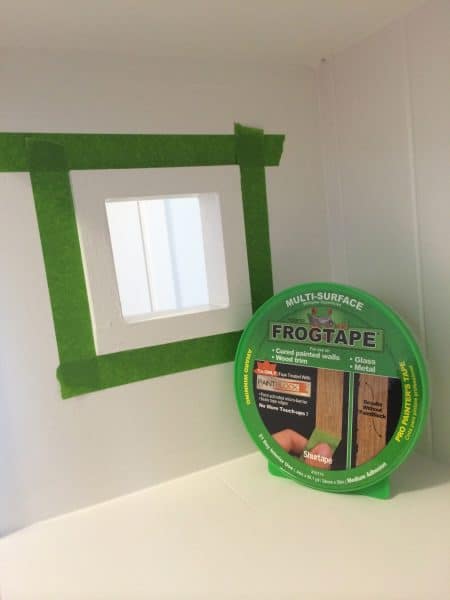
STEP 15. Apply painters tape to the areas around the windows and doors of the dollhouse bookshelf.


STEP 16.

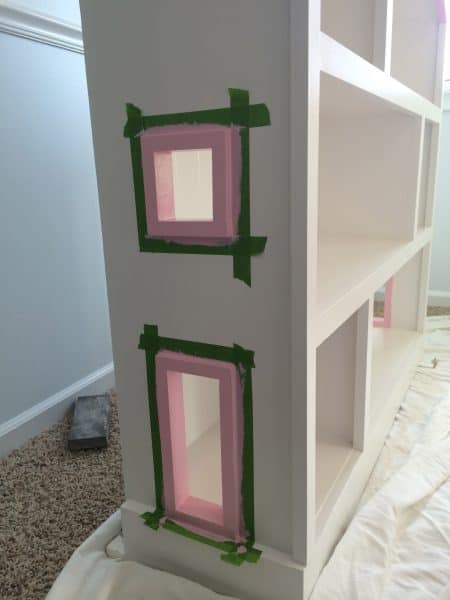
 Then you’ll be able to paint a different color on the windows and rooftop.


dollhouse bookcase

Allow to dry and enjoy the finished product! :)

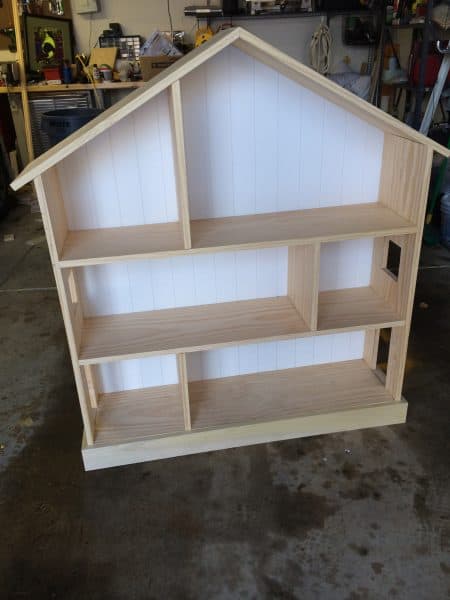
Our Completed Dollhouse Bookshelf…

dollhouse bookcase


dollhouse bookcase

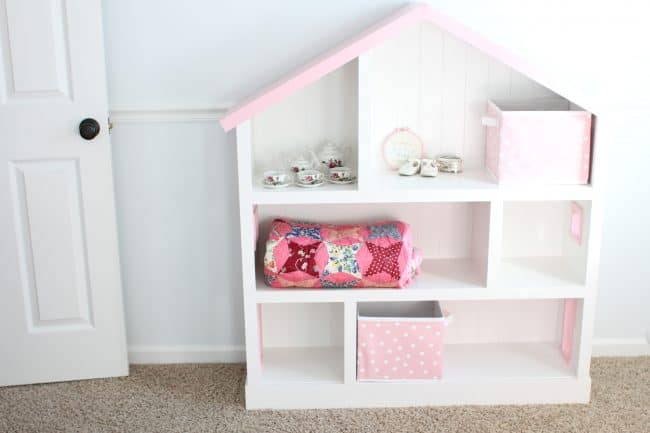
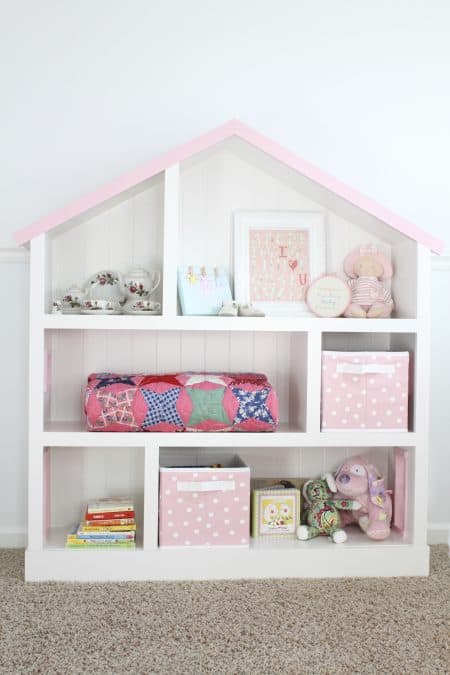
I am in love. I wish I had one of these. :)

diy dollhouse bookcase


diy dollhouse bookcase

Click here for more fun ideas for a girls bedroom or nursery:

Our Baby Girl Nursery

Baby Rag Quilt Tutorial

7 Tips For Moving Your Child Into A Big Bed

Train Table To LEGO Table Conversion

Tips for Organizing Girls Bows and Headbands


Horizontal bookcase


Related Posts

  • DIY Wrapping Paper

    We had two birthday parties yesterday--one for our nephew and one for a close friend…

  • DIY Birthday Shirt

    Last year I spent WAY too much money on a first birthday t-shirt from Etsy…

  • DIY Quiet Blocks

    We've found another way to utilize pool noodles--making them into quiet blocks! I love it…

  • DIY Bathtub Shapes

      I've been trying to think of various ways to teach the names of shapes…

  • DIY Lick-and-Stick Stickers

    What's more fun than stickers??? Making your own lick-and-stick stickers--that's what! It's super easy...all you…

Reader Interactions

Comments

  1. Sarah says

    January 27, 2014 at 2:07 pm

    Love it!! You guys did an excellent job! Thank you for posting the tutorial! My husband is going to make one for our daughter’s first birthday in March.

    Reply
  2. Vicky @ Mess For Less says

    January 27, 2014 at 5:34 pm

    This is awesome! I thank you but my husband does not since I will be asking him to make one for my girls. LOL!

    Reply
  3. [email protected] says

    January 28, 2014 at 12:53 pm

    Wow! That is beautiful! You’re lucky to have such a handy husband. :-) As the mom of 4 boys, I can’t help but to be a bit envious of the fact you are having a little girl. So excited for you and your family! Congrats!

    Reply
    • Jenae says

      January 28, 2014 at 10:00 pm

      Thank you! As much as I have loved decorating my boys’ rooms, it has been fun (and different)! :) And I am very blessed to have a handy husband…it is one of his many gifts!

      Reply
  4. Sarah says

    January 28, 2014 at 9:07 pm

    Would you mind sharing the exact paint colors/brand that you used? They are absolutely perfect!

    Reply
    • Jenae says

      January 28, 2014 at 9:58 pm

      The white paint is Sherwin Williams “Snowbound” in an enamel paint (it was leftover from when the dresser was painted).

      The pink paint is Valspar that we bought at Lowes in semigloss. I’ll have to get back to you on the color… :)

      Reply
      • Emily says

        June 18, 2014 at 7:21 pm

        Thank you so much for posting this!!! I was trying to find one of these on Kijiji, but even then, an older version was $275…and I like yours so much more! <3

        Reply
      • Nicole Neswold says

        September 3, 2017 at 10:26 am

        Love this! I’m having my husband make this for our little girls room! Do you know a guess on how much it cost in the end? Thanks so much!

        Reply
      • D says

        March 18, 2020 at 9:59 am

        Do you know the pink color??

        Reply

Leave a Reply Cancel reply

Your email address will not be published. Required fields are marked *

You Might Also Love

Fun Baby Shower Decoration Ideas On A Budget
Categories: MAKE IT
DIY Taggie Blanket for Baby
Categories: MAKE IT
How To Make A Crayon Wreath
Categories: MAKE IT

Primary Sidebar

Kindergarten Readiness Teach Your Child to Read ABC Printable Scripture Cards Indoor Toddler Activiites

Looking for something specific?

Footer

Note on Copyright

Feel free to use ideas at your home, school or anywhere else you learn and play. If you wish to share any posts or photographs from this site on your blog or website, please make sure to abide by the following copyright guidelines: -Use Only 1 Photo -Maximum of 1-2 sentence description -Include a link to the ORIGINAL post Please do not repost/duplicate more than 1-2 sentences of the tutorial or distribute printed content without written permission from the original author. Please do not use ANY of the photographs on this website on Instagram.
Privacy
© 2021 I Can Teach My Child, LLC. All Rights Reserved. · Site Design and Hosting by SERVOUSLY
The owner and writer of this blog accepts no liability. Readers following instructions and suggestions made by the owner and writers are responsible for their own safety and the safety of minors in their care. All activities require adult supervision at all times. Children under 3 should not participate in any activities that involve small pieces.
Back to Top
This website uses cookies to improve your experience. We'll assume you're ok with this, but you can opt-out if you wish.Accept Read More
Privacy & Cookies Policy

Privacy Overview

This website uses cookies to improve your experience while you navigate through the website. Out of these cookies, the cookies that are categorized as necessary are stored on your browser as they are as essential for the working of basic functionalities of the website. We also use third-party cookies that help us analyze and understand how you use this website. These cookies will be stored in your browser only with your consent. You also have the option to opt-out of these cookies. But opting out of some of these cookies may have an effect on your browsing experience.
Necessary
Always Enabled

Necessary cookies are absolutely essential for the website to function properly. This category only includes cookies that ensures basic functionalities and security features of the website. These cookies do not store any personal information.

  • About
    ▼
    • Developmental Domains of Early Childhood
      ▼
      • Language Development
      • Cognitive Development
      • Motor Development
      • Social/Emotional Development
      • Self-Help/Adaptive Development
      • Spiritual and Moral Development
    • Contact
    • Privacy Policy
    • Disclosure/Disclaimer
    • Terms of Use
  • Thematic Units
  • Concepts
    ▼
    • Alphabet
    • Number Recognition
    • Color Activities For Toddlers
    • Shapes
    • Reading
    • Science Experiments
    • Sunday School Activities
  • Holidays
    ▼
    • Christmas
    • Easter
    • Fourth of July
    • Halloween
    • Thanksgiving
    • Valentine’s Day
  • For Parents
    ▼
    • Gifts
    • DIY Ideas
    • Recipes
    • Photography Tips
    • A Lesson Learned
    • Tools
      ▼
      • Infant Percentile Calculator
      • Children’s Percentile Calculator
      • Children’s BMI Calculator
  • Shop
  • Birth-12 Months
  • 1 – 2 Years
  • 2-3 Years
  • 3-5 Years
  • 6+ Years
  • Blog