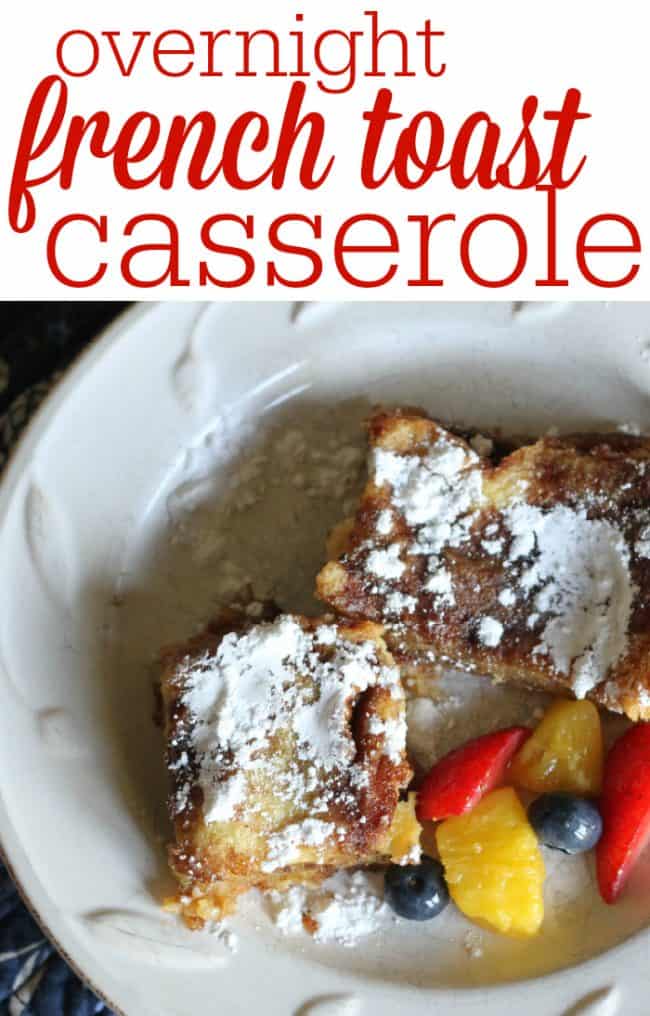
Edible Nests

Edible Nests


We whipped up these edible nests over the weekend for a fun treat.   Despite the snow on the ground, it made our house feel a little more spring-like!

However, when sending your husband to the grocery store to buy “butterscotch chips” be sure and tell him that despite the word “chips” being in the title, they will not be found next to the Lay’s and Ruffles in the chip aisle but rather on the baking aisle near the chocolate chips.  (And Babe, if you’re reading this…sorry!  Just had to tease you about it.).   :)

Here’s the recipe (adapted from this recipe):

1/2 cup peanut butter

1/2 cup butterscotch chips

1 can Chow Mein noodles (about 2 1/4 cups)

M&M’s (or any egg-shaped candy)


IMG_9014


IMG_9020


IMG_9016

 1.  Place your butterscotch chips and peanut butter in a microwave-safe bowl and put on 50% power for 2-3 minutes.


IMG_9019

 2.  Stir together until smooth.


IMG_9018


IMG_9023

3.  Add the chow mein noodles and stir.


IMG_9024

4.  Drop by spoonfuls onto waxed paper and add your M&M “eggs”.  Let them harden overnight (or at least 30 minutes to an hour).


IMG_9029

Yum!


IMG_9031

 Despite my best efforts to stay far away from these babies, I did have one…okay two three.  :)


IMG_9034


  • Share This Post:
  • Share This Post on Facebook
  • Share this Post on Twitter
  • Email this Post

St. Patrick’s Day Cookies

St. Patrick's Day Cookies

Just in case I couldn’t convince you at 4th of July or Christmas, these sugar cookies seriously are the best ever!  And obviously, they are easily adaptable for any holiday with the help of some trusty cookie cutters.

Go here to print the recipe.  


IMG_8962


The boys are great helpers!


IMG_8964


IMG_8966

The frosting is actually a glaze that hardens shiny and smooth!


IMG_8970


Yum!

Looking for another St. Patrick’s Day Treat?  Try these Pot ‘O Gold Cupcakes!

Pot O Gold Cupcakes


  • Share This Post:
  • Share This Post on Facebook
  • Share this Post on Twitter
  • Email this Post

French Toast Casserole

I am probably the most UN-MORNING person in the entire world.  Seriously.  I am pretty much a Zombie until 9, at the earliest.  But on the rare occasion that I do fix breakfast for my family (that doesn’t include a bowl of cereal, yogurt, or an Eggo waffle), I want it to be something I can prepare the night before and throw in the oven in the morning (have I told you I’m not a morning person?).  This French Toast Casserole is the perfect EXTRA SPECIAL breakfast!

You can print the recipe here.  It is adapted slightly from Frugal Upstate.


 1.  Melt 1/2 cup of butter and pour it in the bottom of the 9×13 casserole dish.


2.  Lay 6 pieces of white bread on top of the melted butter.


 3.  Mix 3/4 cup of brown sugar and 1 teaspoon of cinnamon.


4.  Pour half of the brown sugar mixture on top of the first layer of bread.


5.  Add the second layer of six pieces of bread over the top of the brown sugar mixture.


 6.  In a separate bowl, mix 5 beaten eggs, 1 1/2 teaspoons vanilla extract, and 1 1/2 cups of milk.


 7.  Pour the egg mixture over the casserole.


8.  Top with the remaining brown sugar mixture.


 9.  Cover and refrigerate overnight.


10.  The next morning, cover the casserole dish with aluminum foil and then bake at 350 degrees for 30 minutes.  Uncover and bake for another 15 minutes.


 We served with a side of fruit:  Yummy!!!

What’s your favorite easy breakfast recipe???

  • Share This Post:
  • Share This Post on Facebook
  • Share this Post on Twitter
  • Email this Post

Quick & Healthy Snack Ideas for Kids

Looking for a few quick and healthy snack ideas for kids?  Here are a few of our current favorites!  Rest assured they are SUPER easy (otherwise, I wouldn’t be making them).  :)


Snack #1:  Frozen Blueberry Yogurt Bites

This is officially Little Brother’s favorite snack!  He loves these little bites!  I made them two different ways, as you’ll see below.  The second way was definitely easier (and they look sort of like googly eyes).  :)

All you need are blueberries and yogurt (we used vanilla-flavored Greek yogurt).


 Method #1:  Put some yogurt in a bowl and dump a few berries in…


 …use your fingers to remove the blueberries.


 Put the coated blueberries on a plate covered with waxed paper and freeze.


Method #2 (recommended):  Put 1/2 cup of yogurt in a ziploc bag.  Snip the corner.


 Make several yogurt dots on the waxed paper…


 …and then put a blueberry on top of each yogurt dot.


Freeze for a couple hours.


Frozen and ready to eat!  Thanks to this winning combination, they are tart and slightly sweet!

Snack #2:  Apple Spirals with a Peanut Butter Core


Behold, the greatest kitchen gadget ever.  The boys and I got one of these Apple Peeler, Corer & Slicer for Prince Charming for his birthday and it is amazing.  I don’t get too worked up about most kitchen gadgets, but this one is really cool!


Put the bottom of the apple into the spokes…


…and let your child turn the handle.  Voila!  That’s it!


This was a very small Pink Lady apple.  It works even better with slightly larger apples (and potatoes, apparently).


Put a glob of peanut butter in the core.


 Peanut Butter and apples have never been easier!

If you want to pack this in a lunch without it getting brown, just rub a little bit of lemon juice over the peeled apple!


“Look, Mommy! It’s a C!”


Snack #3:  String Cheese Octopus


I normally don’t get into themed lunch/snack ideas.  I figure that there are way too many kids around the world who have nothing to eat, my children don’t need a lunch that looks like the latest cartoon character.  However, this is just way too simple not to share (FYI:  I normally don’t even draw a face on the octopus…I just make the eight tentacles and call it good).

Split the string cheese into 8 sections on one end.  Pull a little more than halfway up.


To draw the face, use a toothpick to make the shape…


…and then use a tiny bit of mustard (or ketchup) to fill in!


What is your child’s favorite snack???

  • Share This Post:
  • Share This Post on Facebook
  • Share this Post on Twitter
  • Email this Post

Fruit Pizza Cupcakes

If you are a fan of traditional fruit pizza, you will be delighted with these little fruit pizza cupcakes!  I made these for Prince Charming’s 30th birthday party that we had with both of our families.  To my great satisfaction, there were some leftover that I have been sneaking for my “breakfast” several mornings this week.  Hey… It has fruit in it, so it must be healthy, right?!?!  ;)

And there is an extra layer that you may not have had in other fruit pizzas…Cool Whip sandwiched between 2 layers of fruit!

Download and print the entire recipe here.

To save time and effort, I just used Pillsbury Refrigerated Sugar Cookie Dough.  I don’t normally like this type of sugar cookie by itself or with icing (I would much rather have our World’s Best Sugar Cookies), but it tastes SUPERB as the shell for our Fruit Pizza Cupcakes and is sturdy enough to hold everything together!


1.  Slice off 1/2 inch of dough from the refrigerated cookie dough.  Place each dough slice on a cupcake pan turned upside down.  (Tip:  I actually found the dough to “run” more evenly if you make a ball with the dough first and then put the ball on top of the upside down cookie sheet.)


2.  Bake at 350 degrees for 12-16 minutes (or until golden and firm to the touch).  This is longer than the instructions on the dough packaging tells you because you’ll want the cookie cupcake shell to be somewhat hard to keep its shape.


3.  Carefully, ever so carefully, remove the cookie  from the upside down cupcake pan (I had 3 out of the 26 that ended up falling apart during this step).


 Beautiful cookie shells!


 4.  Mix 1 8oz. package of softened cream cheese with 1/2 cup of powdered sugar and 1 tsp. vanilla.


5.  Use a spoon or spatula to spread the mixture into the shells.


 6.  Wash and cut up your fruit–we used fresh strawberries, pineapple, and blueberries.


 7.  Place your first row of fruit on top of the cream cheese mixture.


8.  Add a dollop of cool whip to each cupcake, spread evenly, and then top with another layer of fruit!


 Yum!


Now if you’ll excuse me, I think one of these babies is calling my name for an afternoon snack!


  • Share This Post:
  • Share This Post on Facebook
  • Share this Post on Twitter
  • Email this Post