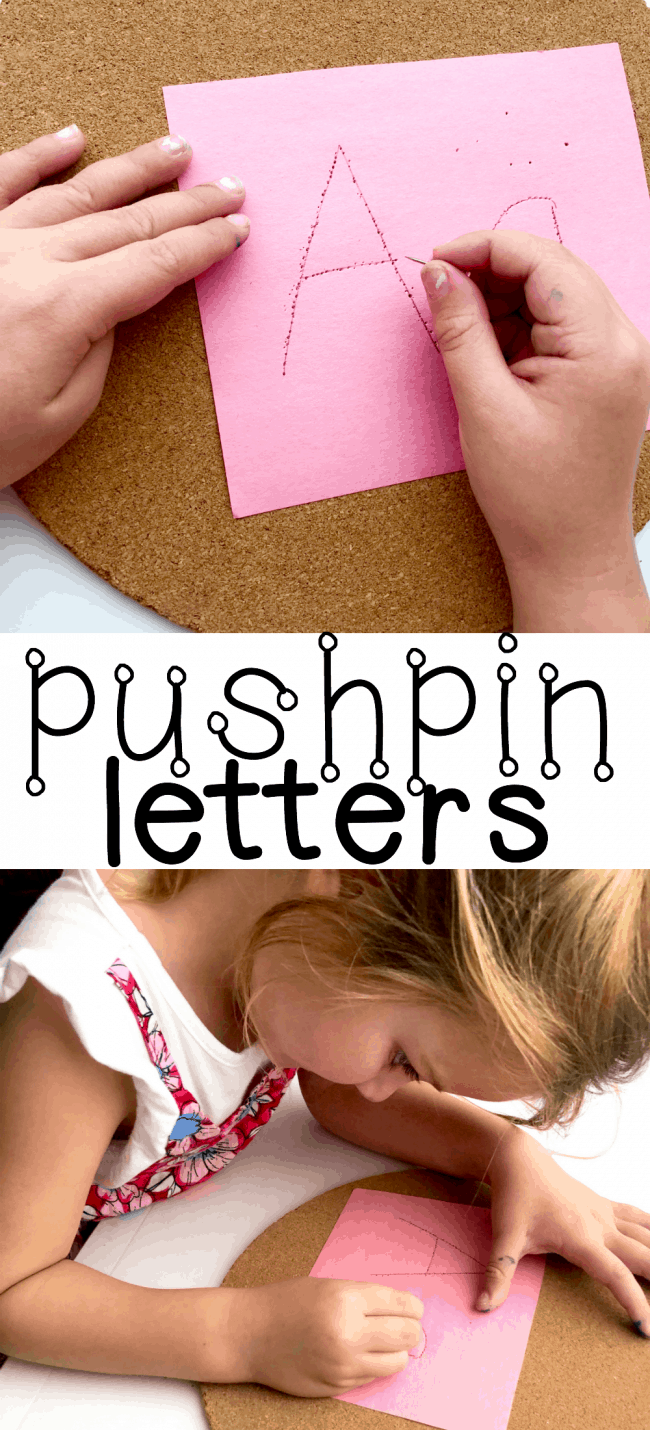
It’s Day 1 of our 30 Days of Reading Fun for Beginning Readers series…and it is also a holiday weekend, so we are having a little fun with this first activity. This Pushpin Letters activity is great for promoting…
We’re kicking off our thematic unit on “Digging up Dinosaurs” by making this Dinosaur Fossils Craft using recycled coffee grounds. Besides being fun to make, these will be going in the sensory tub for the next week or two! …
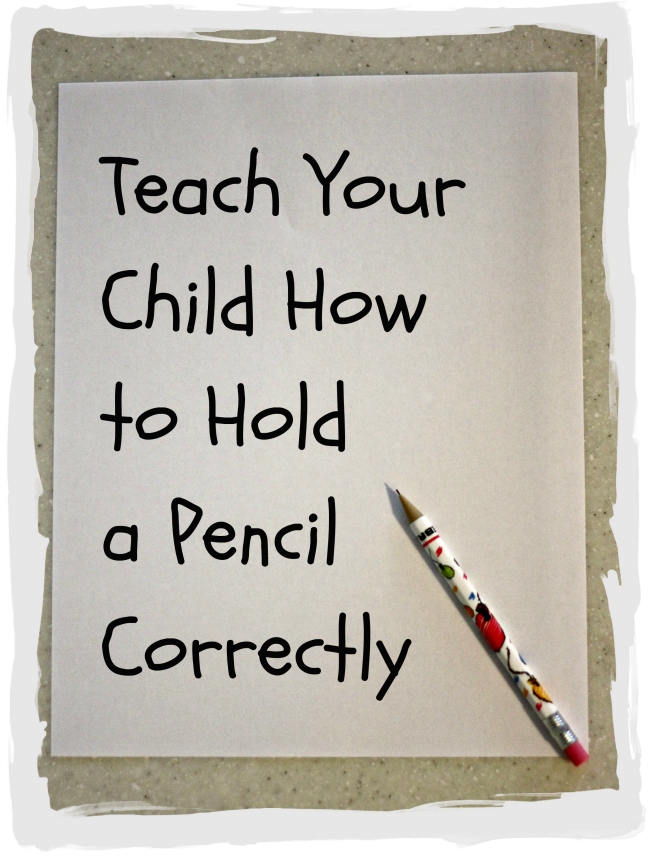
How To Hold A Pencil Learning to hold a pencil correctly is an important skill for preschoolers. Truth be told, many children came to my first grade classroom still holding their pencil in a fist. While this is okay for…
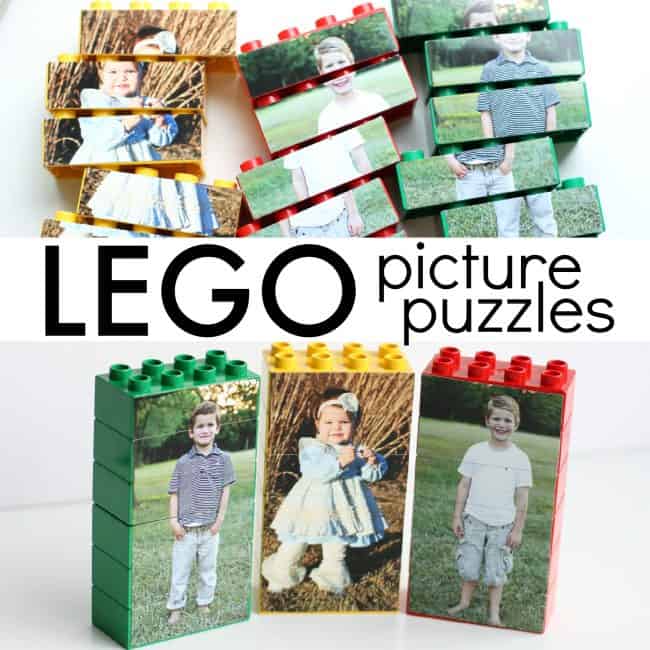
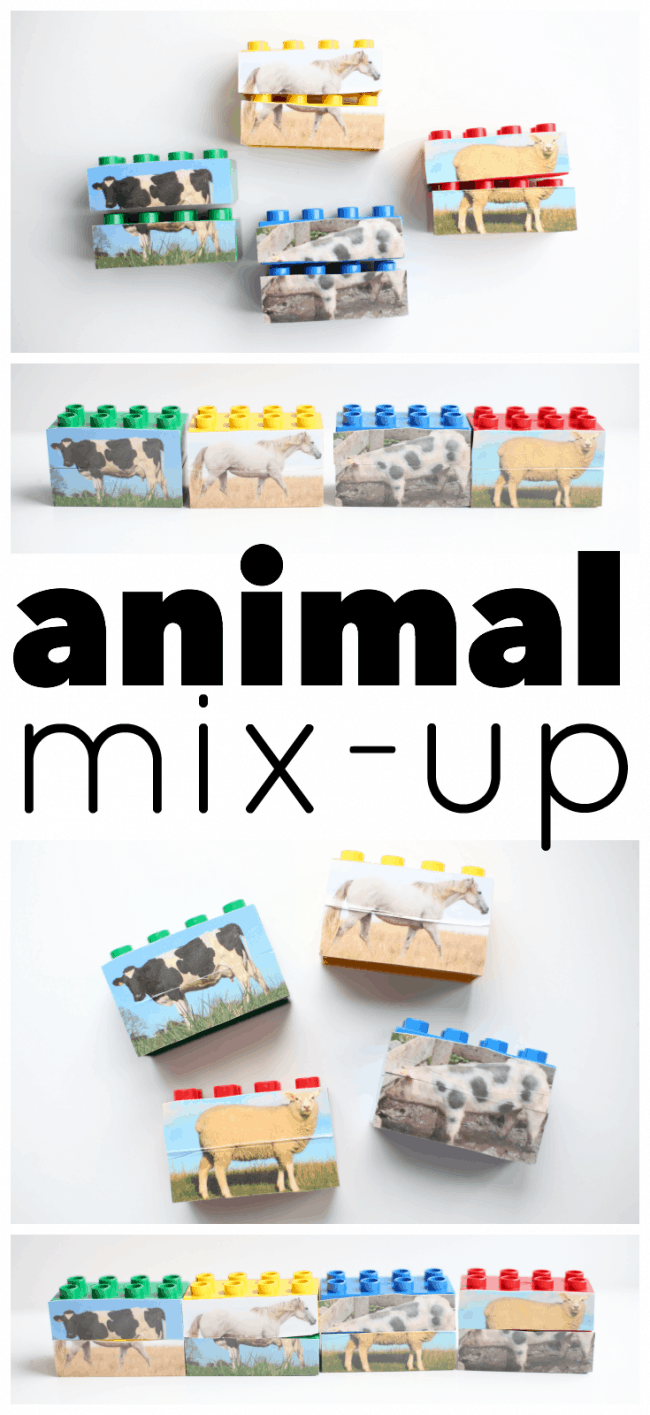
We have had so much fun with these LEGO picture puzzles! The boys and I just laughed and laughed at the combinations they created. And the LEGO “puzzles” took only a few minutes to make once I had the…
This post is sponsored by Walmart. All opinions are 100% mine. My boys head back to school next week and one of the activities we’ve wanted to do all summer is make slime! We decided to try something…
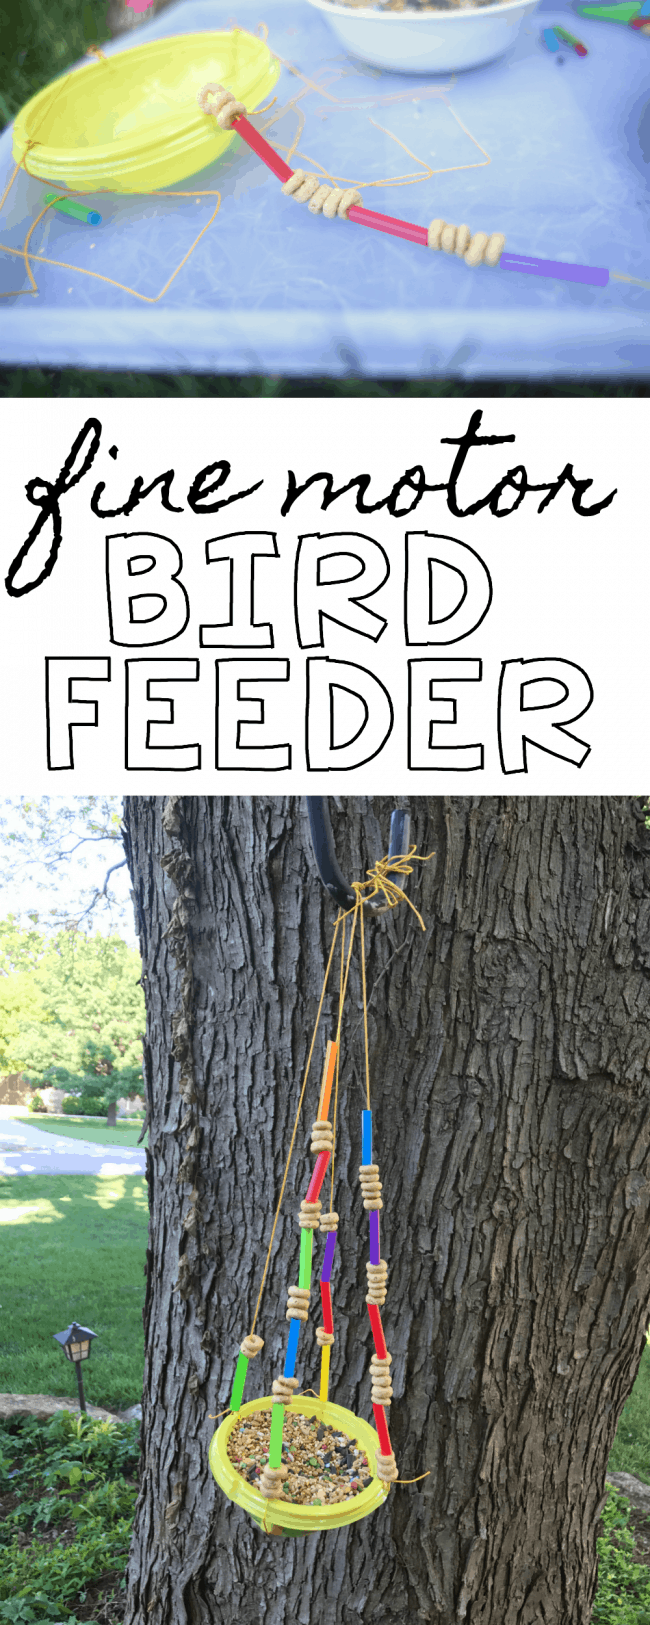
It’s Day 25 of our 31 Days of Outdoor Activities for Toddlers! We just discovered two beautiful bird nests in our yard in the last few days so making another DIY Fine Motor bird feeder seemed like a great…
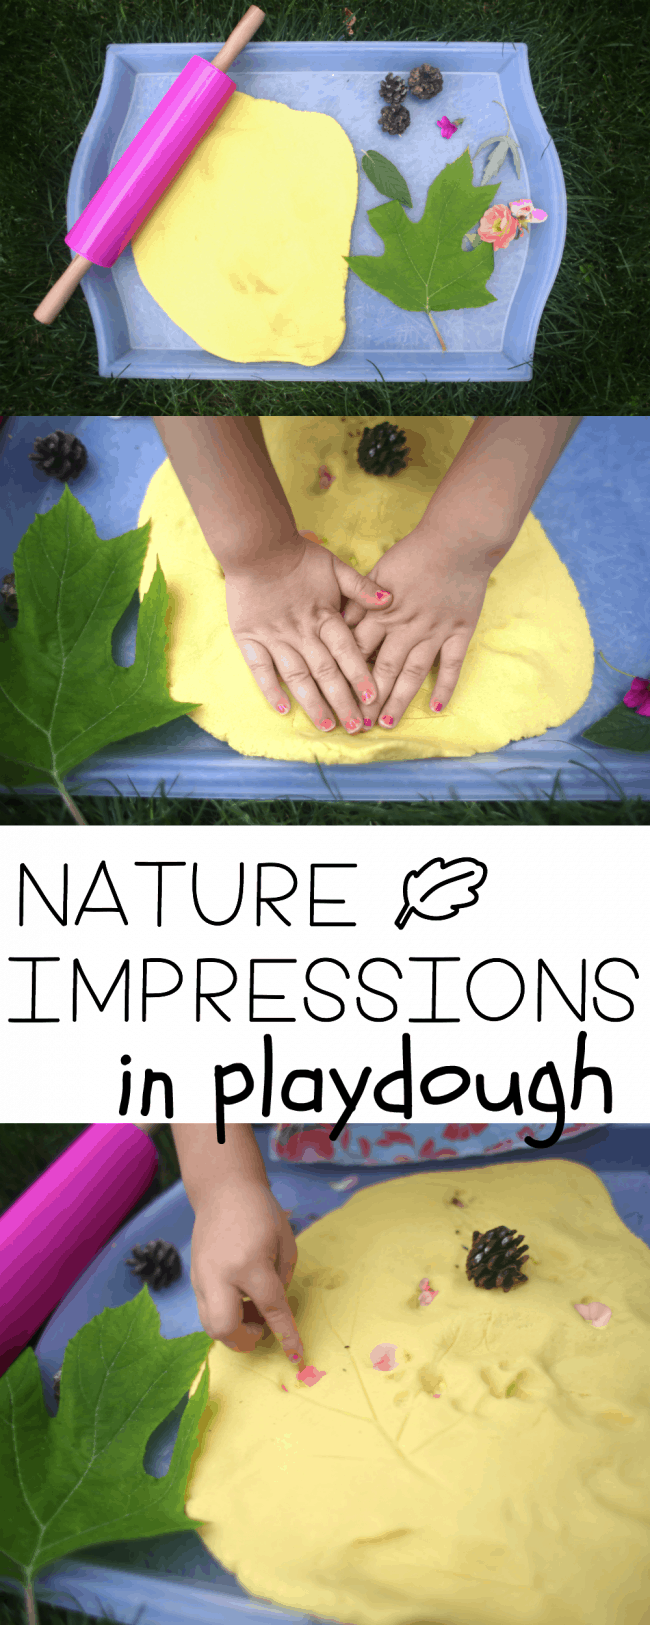
It’s Day 16 of our 31 Days of Outdoor Activities for Toddlers and today we made nature impressions in playdough! This was such a simple activity but something I know we will come back to again and again…
It’s Day 5 of our 31 Days of Outdoor Activities for Toddlers series! Today we recreated an old favorite…scooping and sorting lids for toddlers! We have done this activity in a variety of different ways but today we decided…
It’s Day 4 of our 31 Days of Outdoor Activities for Toddlers! Today we experimented with creating Outdoor Tree Bark Rubbings in our backyard! Little Sister LOVED this activity spent at least 30 minutes coloring the tree! …
“WHAT are you doing!?!” I caught my toddler with a scissors her big sisters had left out. There she was, quietly snipping up the mail. Her reply was simply, “Snippy.” That’s how the Snippy Chicks got their name!…
Today is Dr. Seuss’s birthday! This idea came to me while I was reading Bartholomew and the Oobleck to Little Sister (3 years old) this morning. This has been one of my boys’ favorite Dr. Seuss books for quite a while…
Post by Contributing Writer Amy This fun fall project for toddlers not only helps them work on fine motor skills and hand-eye coordination, it also doubles as a fun suncatcher when it’s finished! My toddler (age 2.5) really…
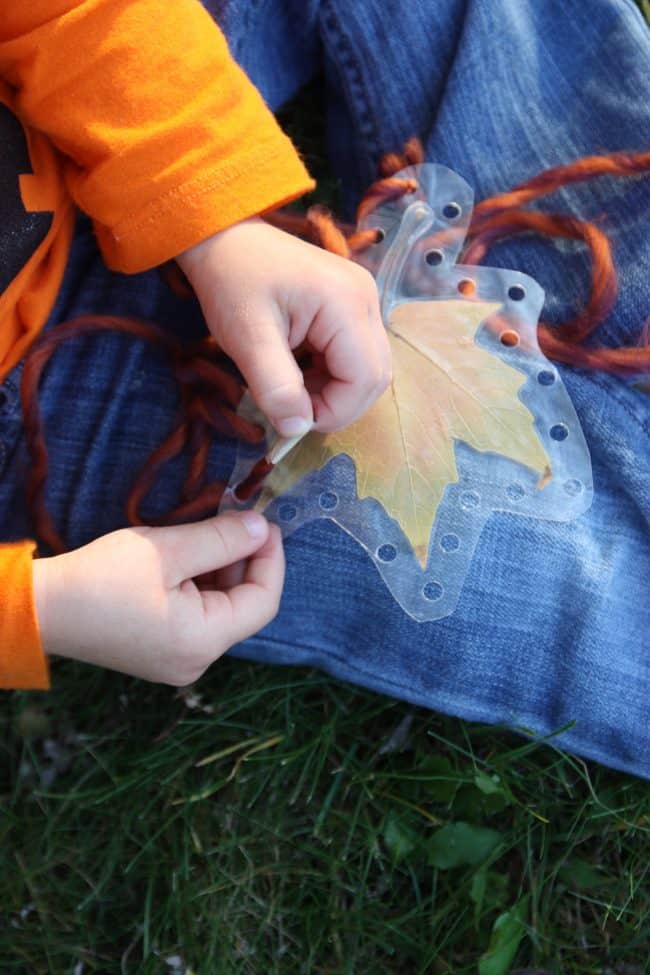
Post by Contributing Writer Amy This project puts together two things I love: fall and laminating! Really, there is something so satisfying about seeing something go through the laminator. My kids were mesmerized watching me run the leaves through…
Today is our first day of our 4-week Toddler Time challenge! Since it is Monday, our activity is focusing on colors. This Sorting and Threading Foam Beads Activity for Toddlers is excellent for color recognition and fine motor skills….
This month’s Virtual Book Club for Kids is one of my absolute favorite books for toddlers: Brown Bear, Brown Bear, What Do You See? by Bill Martin Jr. and illustrated by the talented Eric Carle. We read this book…
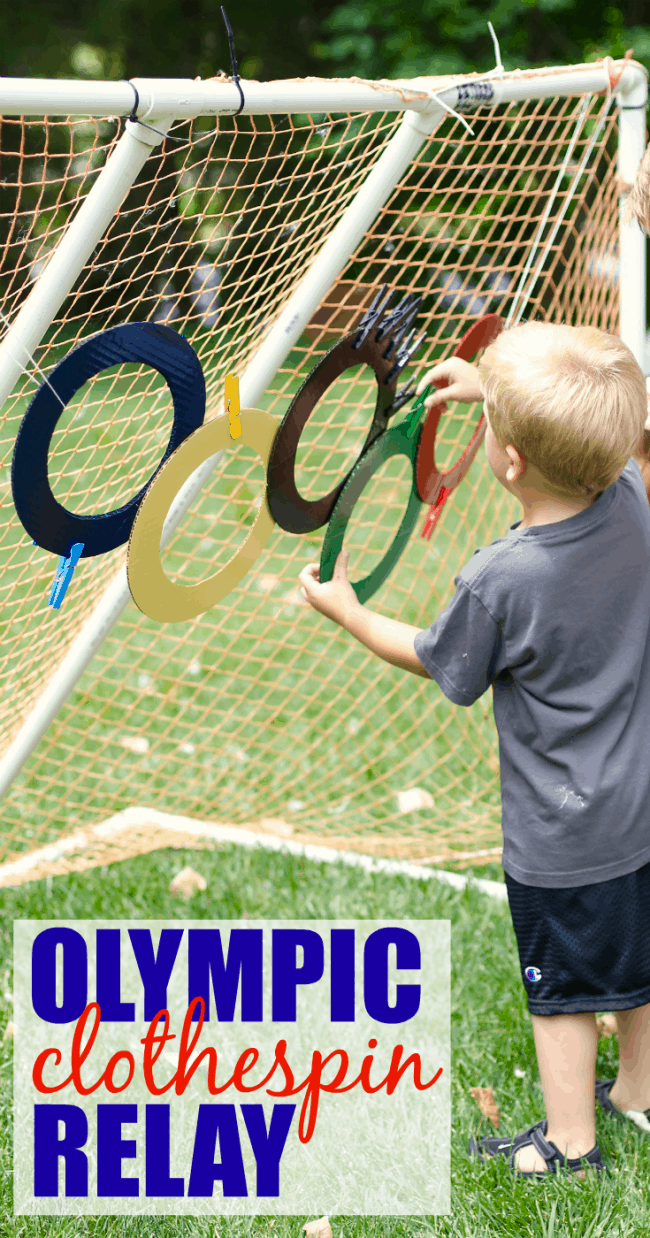
It’s Day 3 of our “A Very Toddler Olympics” series we are co-hosting with Kristina from Toddler Approved. We are reusing our cardboard Olympic Rings we made for our Olympic Ring Ball Toss on the first day of…
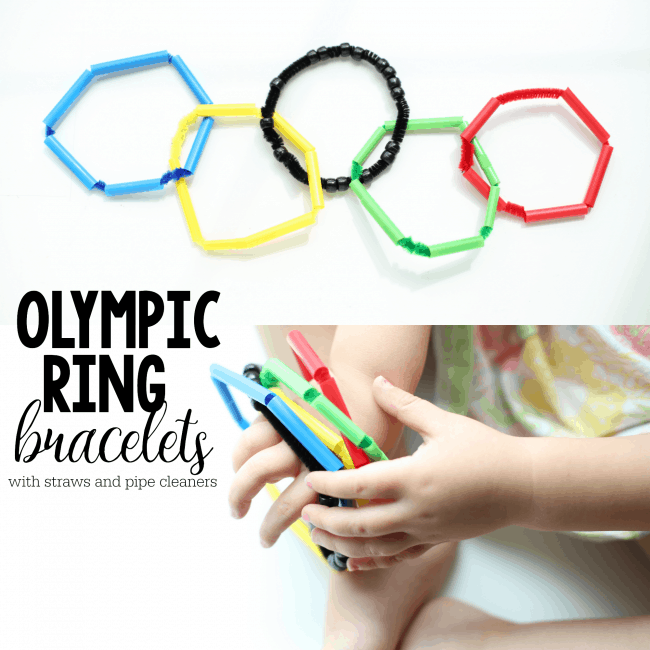
It’s Day 2 of our “A Very Toddler Olympics” series with Kristina from Toddler Approved. You can see all the posts in our series so far here. I love everything about the Olympics and am super excited to watch…
Years ago I created an Animal Mix-Up LEGOs activity that was pretty much identical to this one. Unfortunately, however, when I transferred my blog from one platform to another (Blogger to WordPress), this specific post was somehow lost (and…